Holes In Metal Fenders

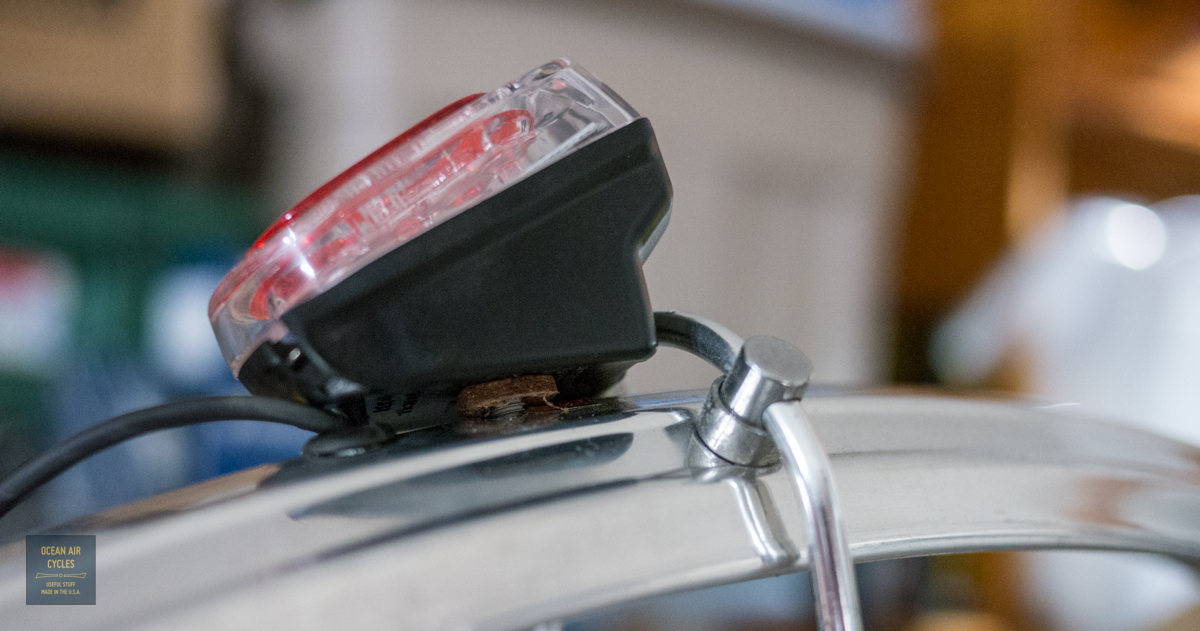
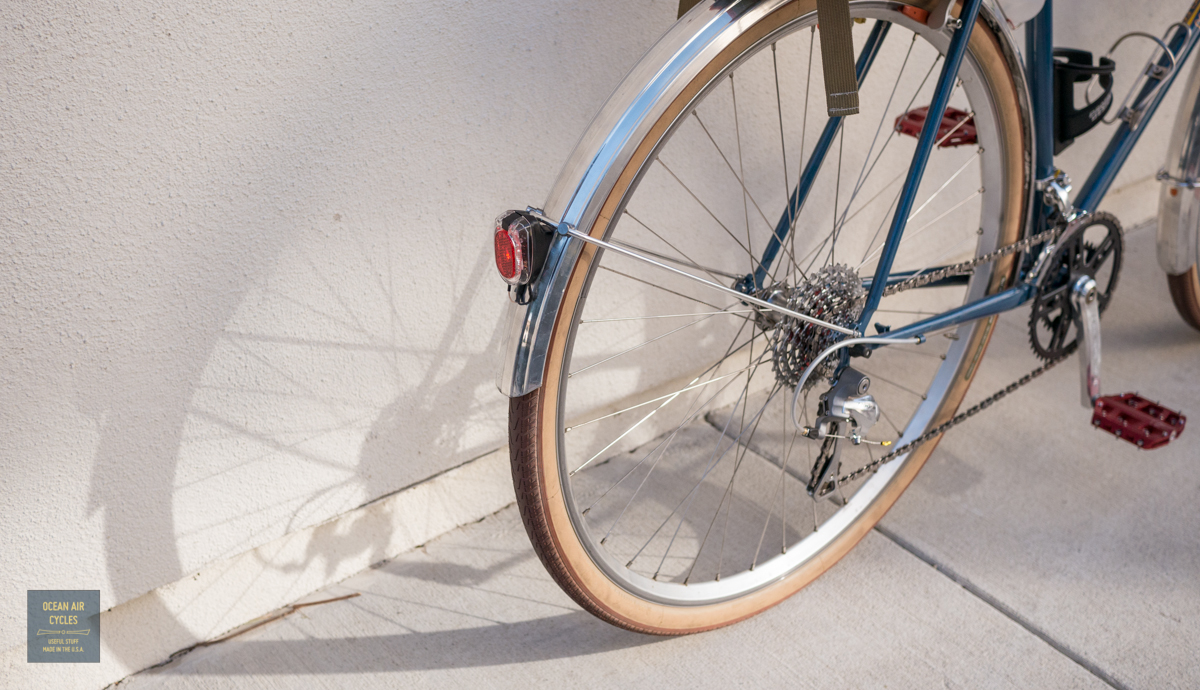
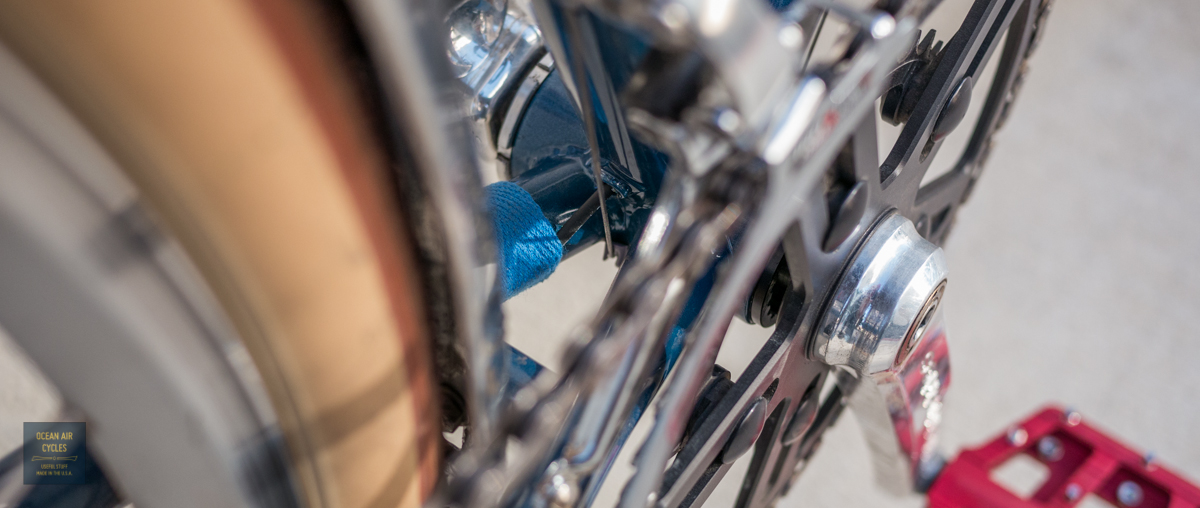
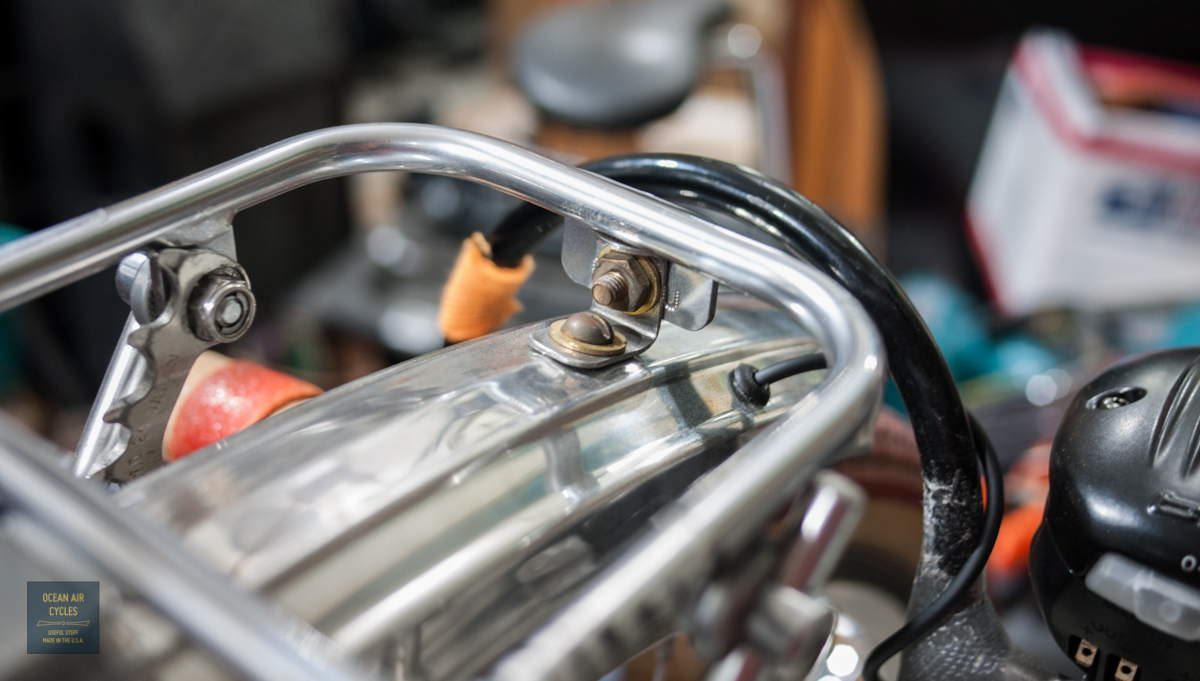
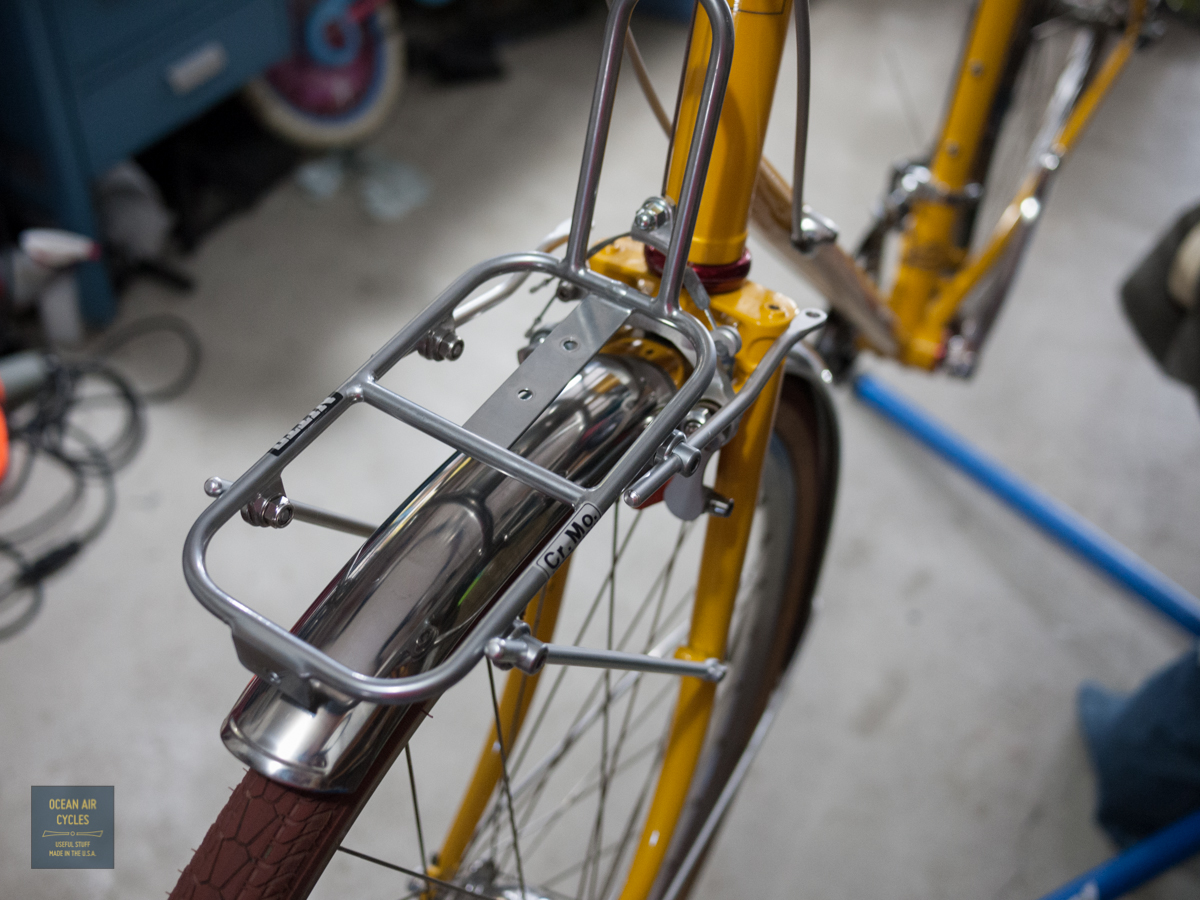
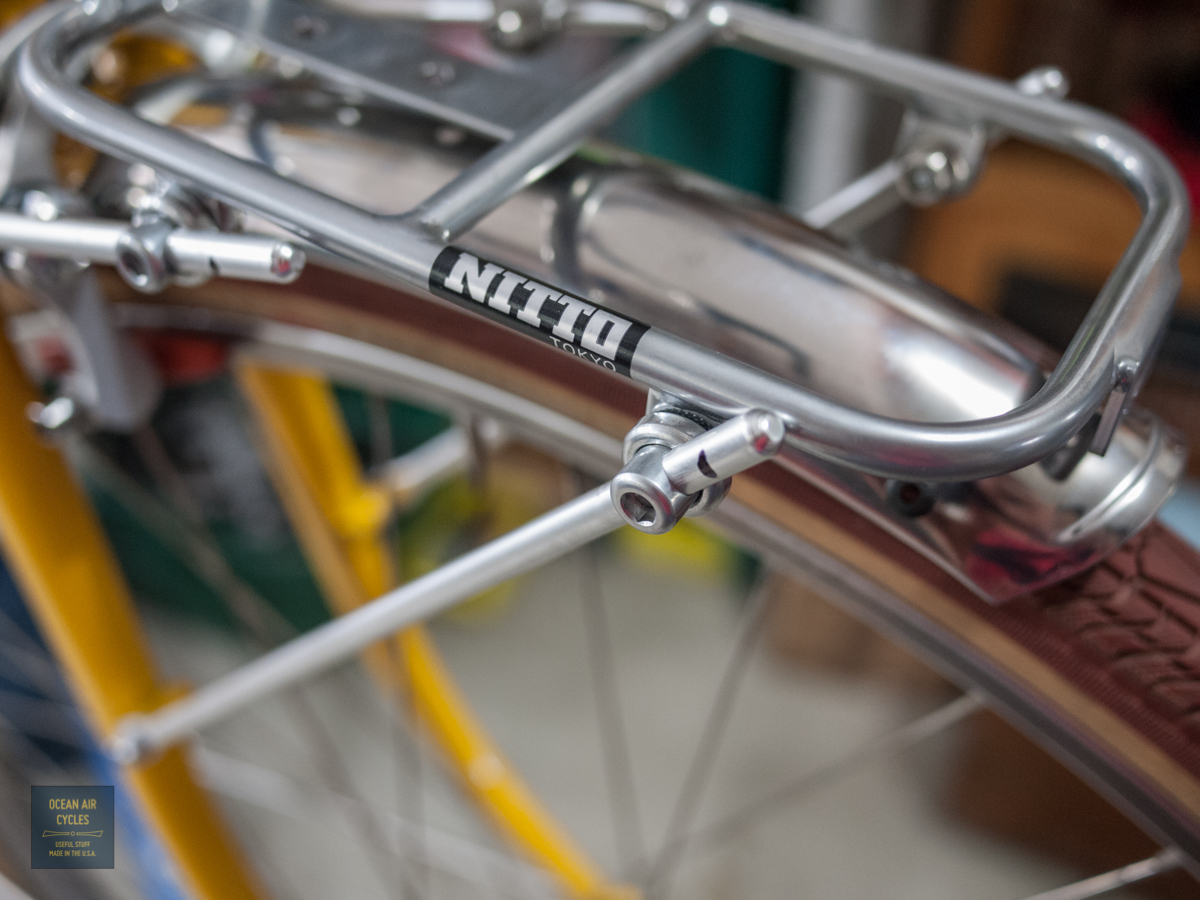
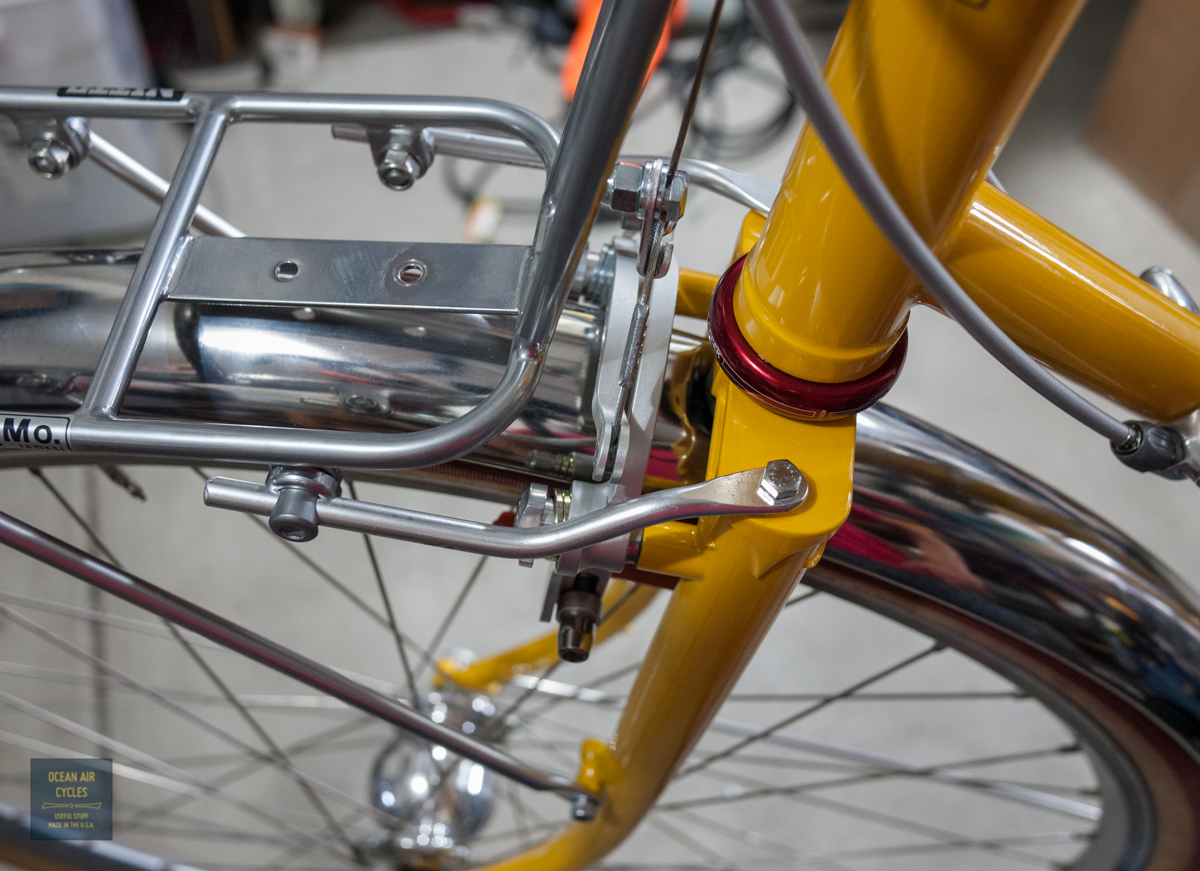
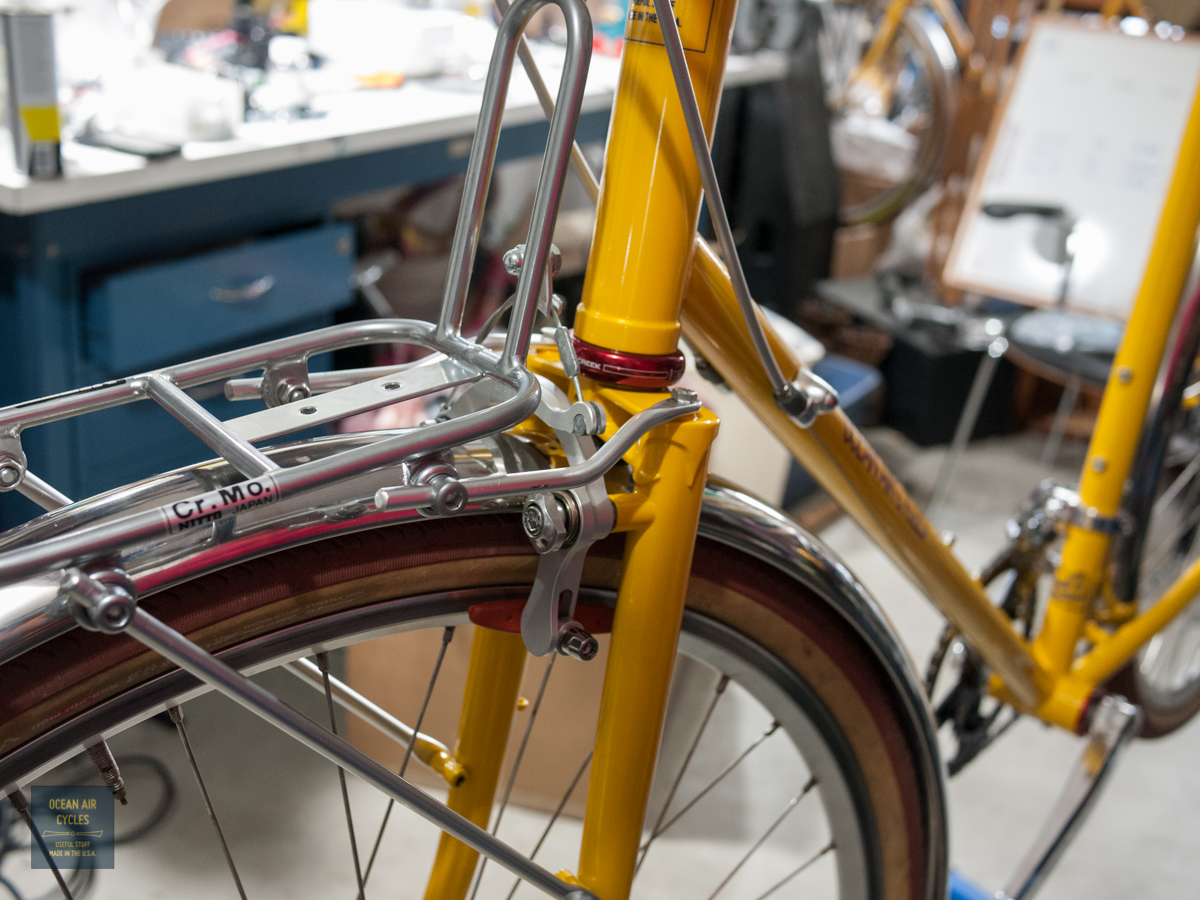
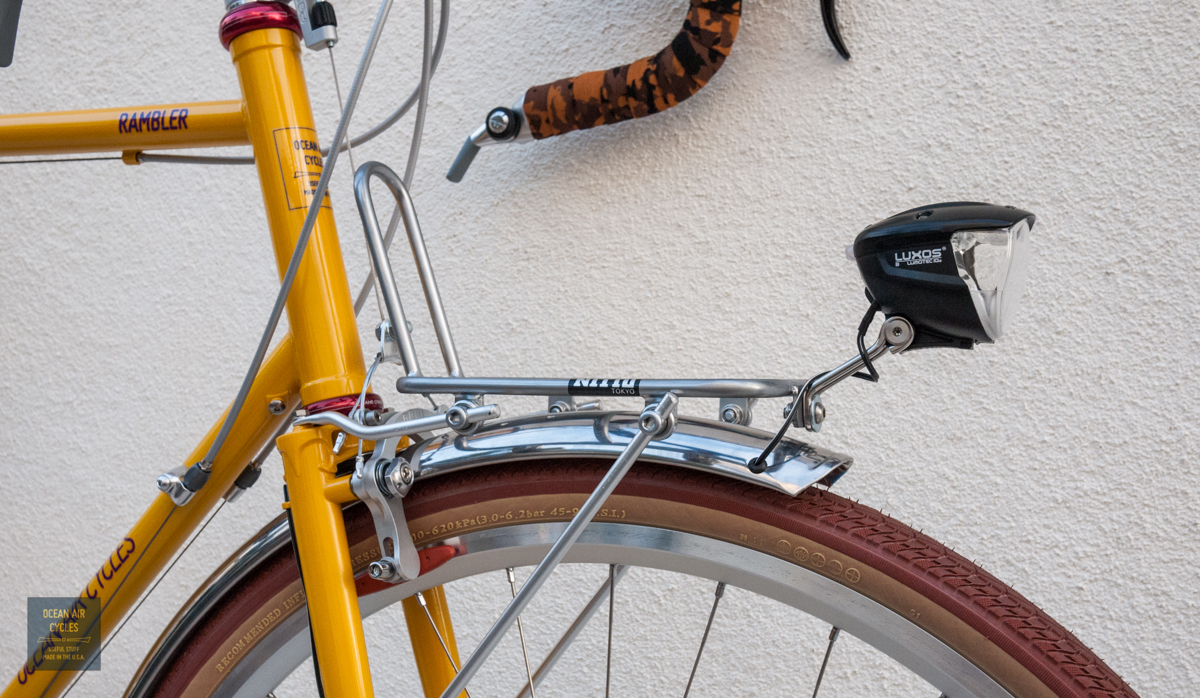
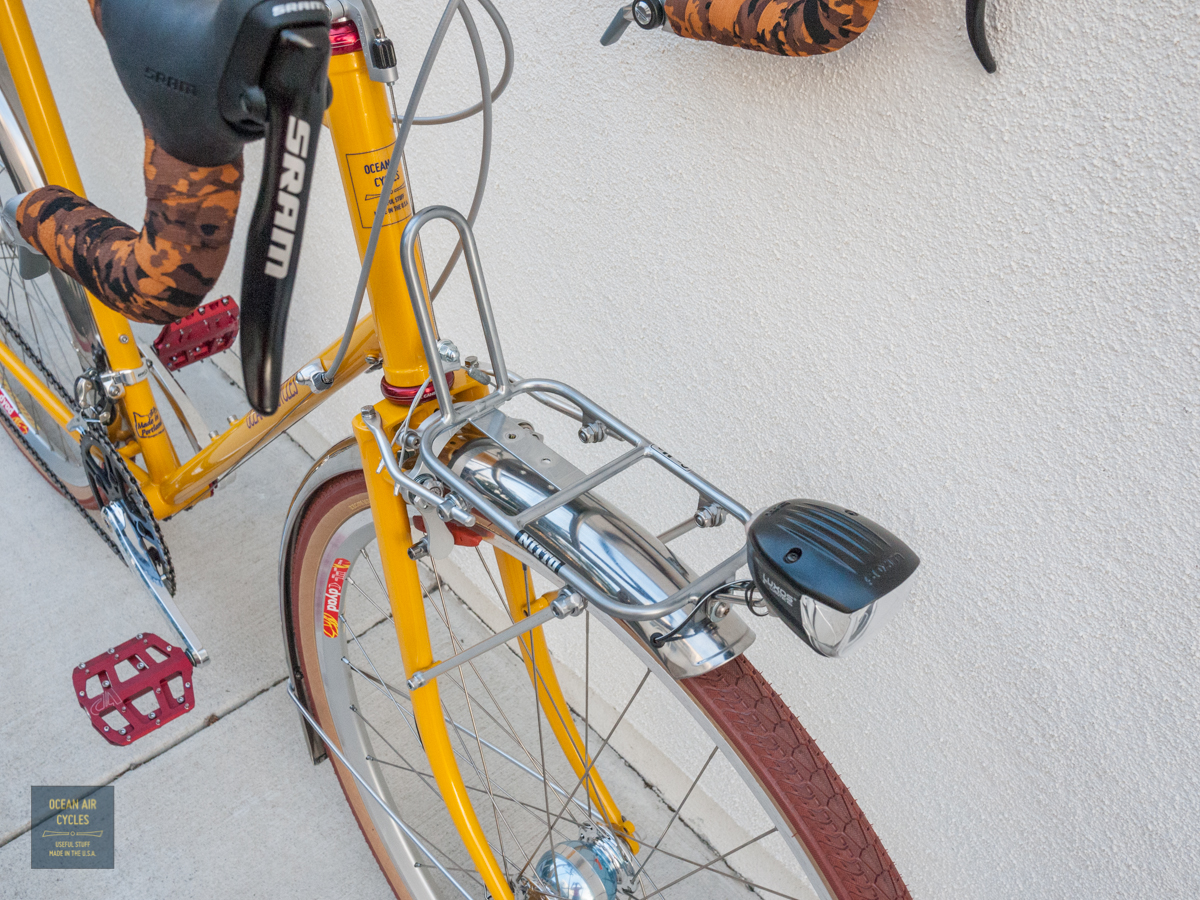
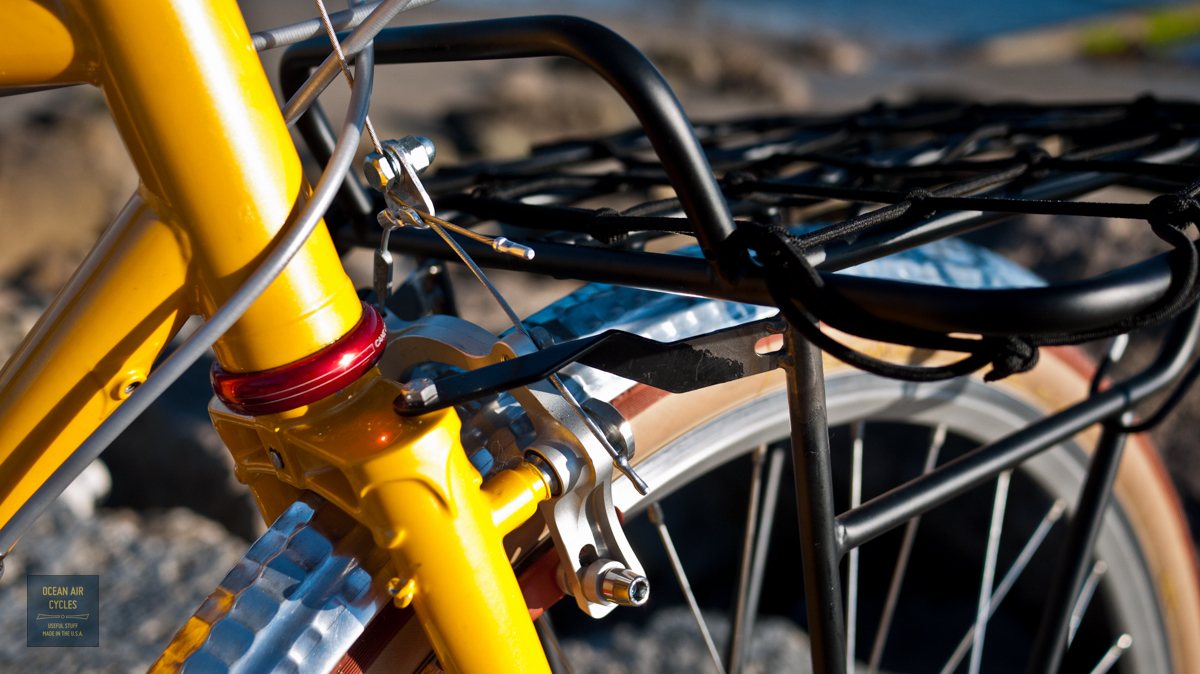
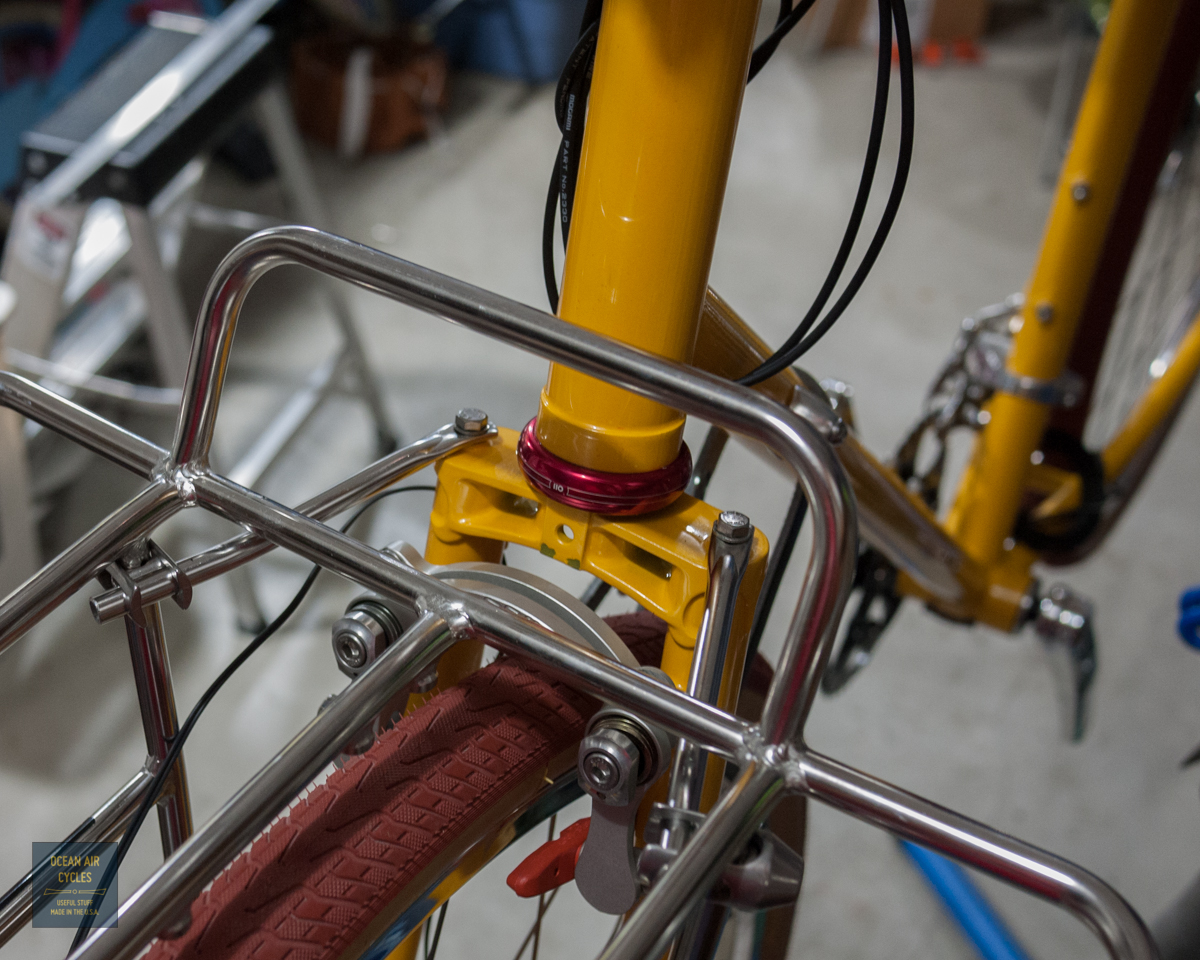
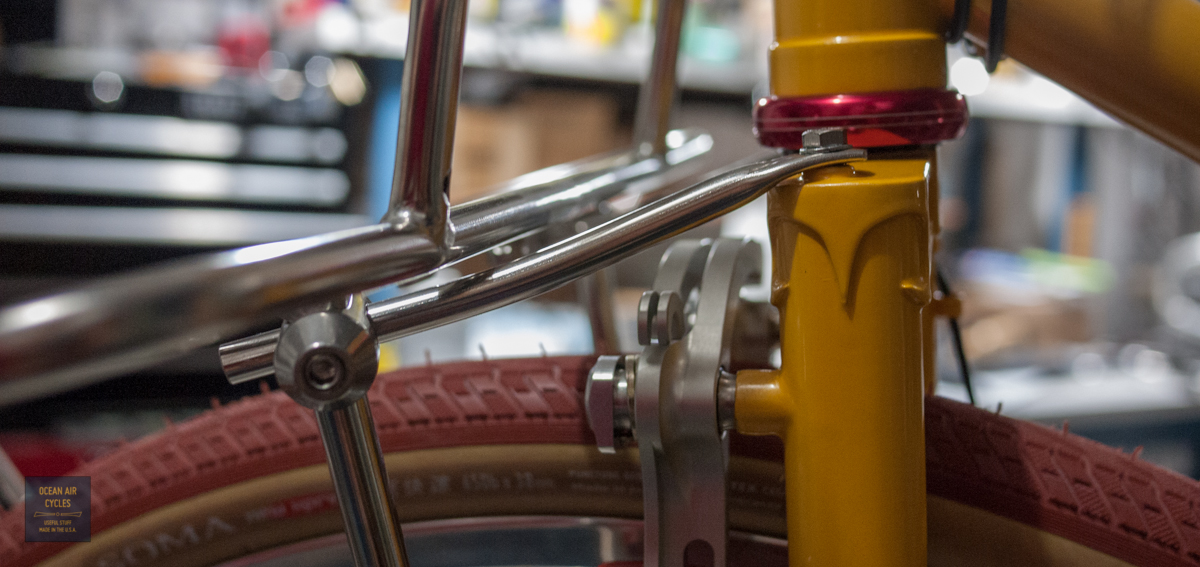
Metal fenders offer a bunch of benefits over their plastic counterparts.  They are often lighter, offer better coverage of the tire, the rolled lip reduces side spray, they generally look nicer, etc.  One of the challenges of the fender though is the need to put more hand work into the install.  My last post resulted in a few questions that made me realize our readers could use a little more info on some sheet metal working skills used to put holes in the fender.  Part of installing the fender, lights and wires will often if not always require you to make holes in what are perfectly good fenders.  Good technique and proper tools can make this a breeze, a couple of lazy steps could leave you with expensive scrap metal.  I documented an install of a headlight on a bike that already had the rack and fenders mounted in place.  If you are building from scratch it is often far easier to make all of the needed holes at the work bench.

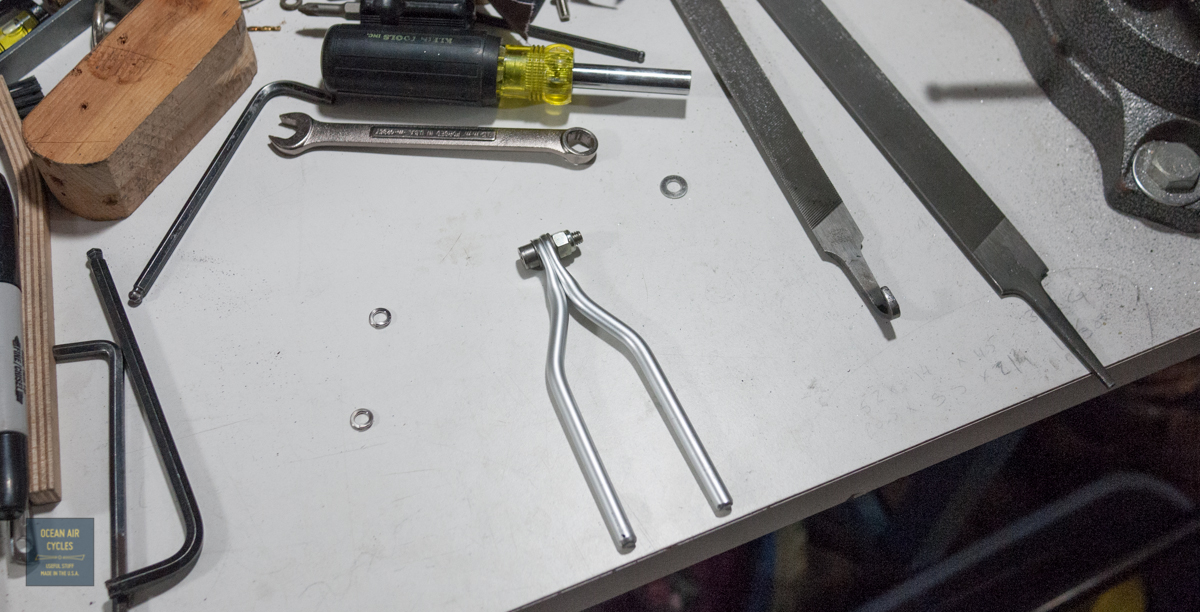
Here are the basic tools you will need: Marker, Drill Bits (in the event that you did not get a step bit), Countersink, Round File, Step Bit, Center Punch, Stress Relief Grommets, Wooden Backing, Drill Motor

1.25 holes-1040548 ano
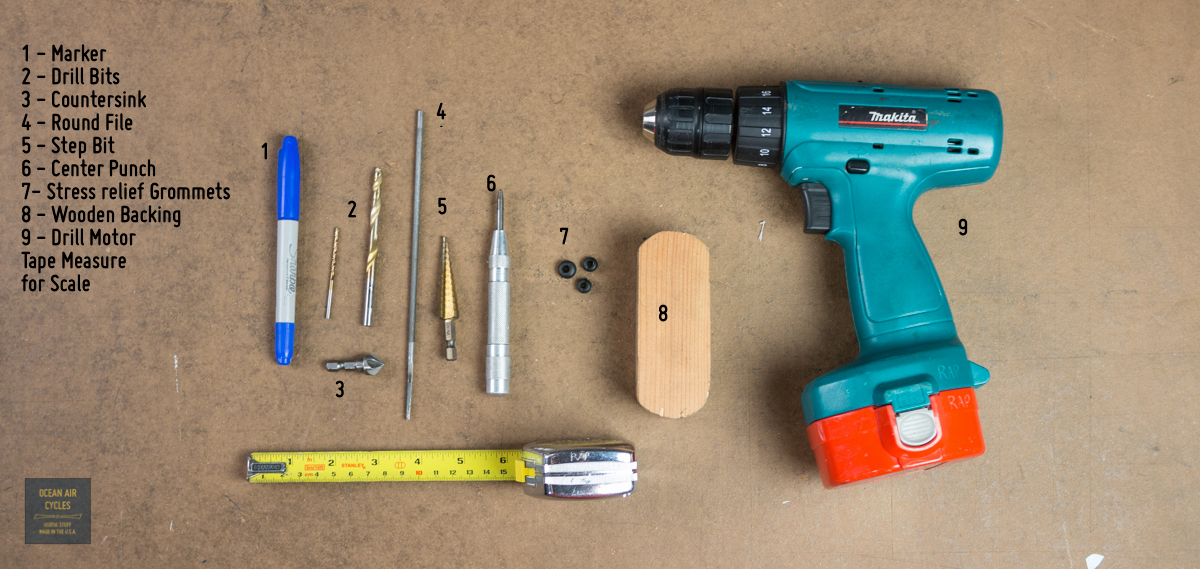
There are other tools out there, like a large hole punch made by Honjo, but these are the basic hand tools that many of you may already have, or can get at you local hardware store.

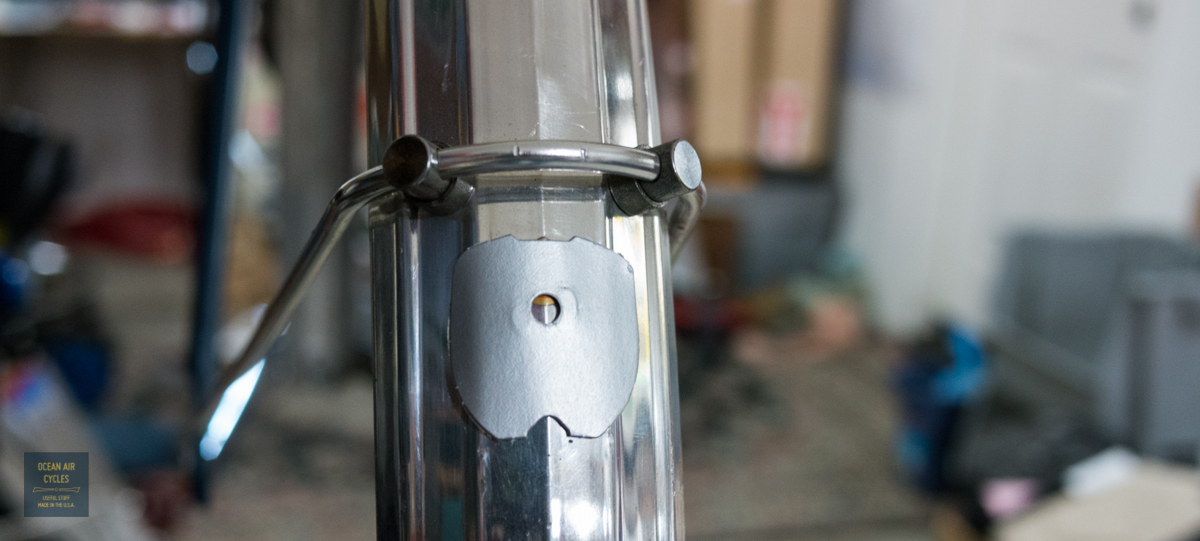
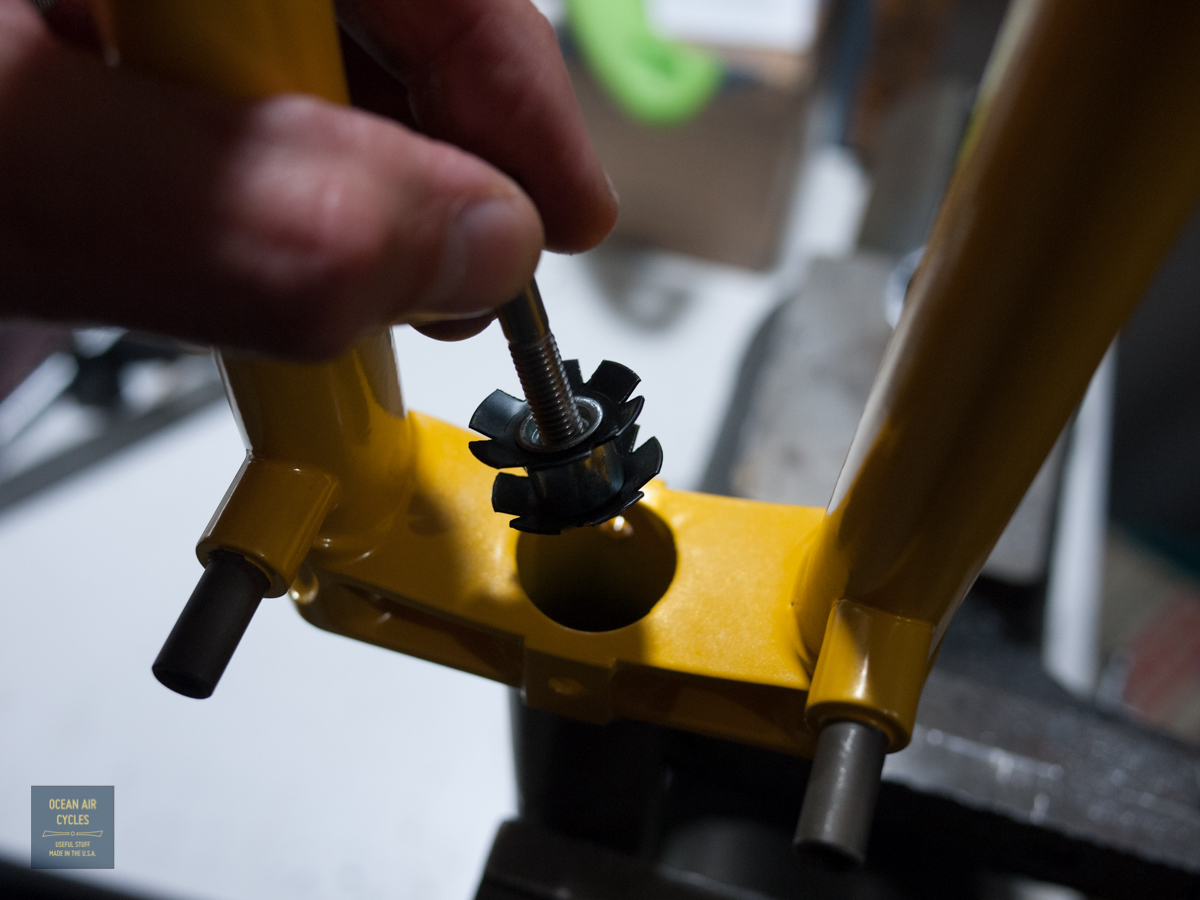
First step is to put your drill bit into the motor, think about where your holes will be, then remove everything that is in the way.

1.25 holes-1040551
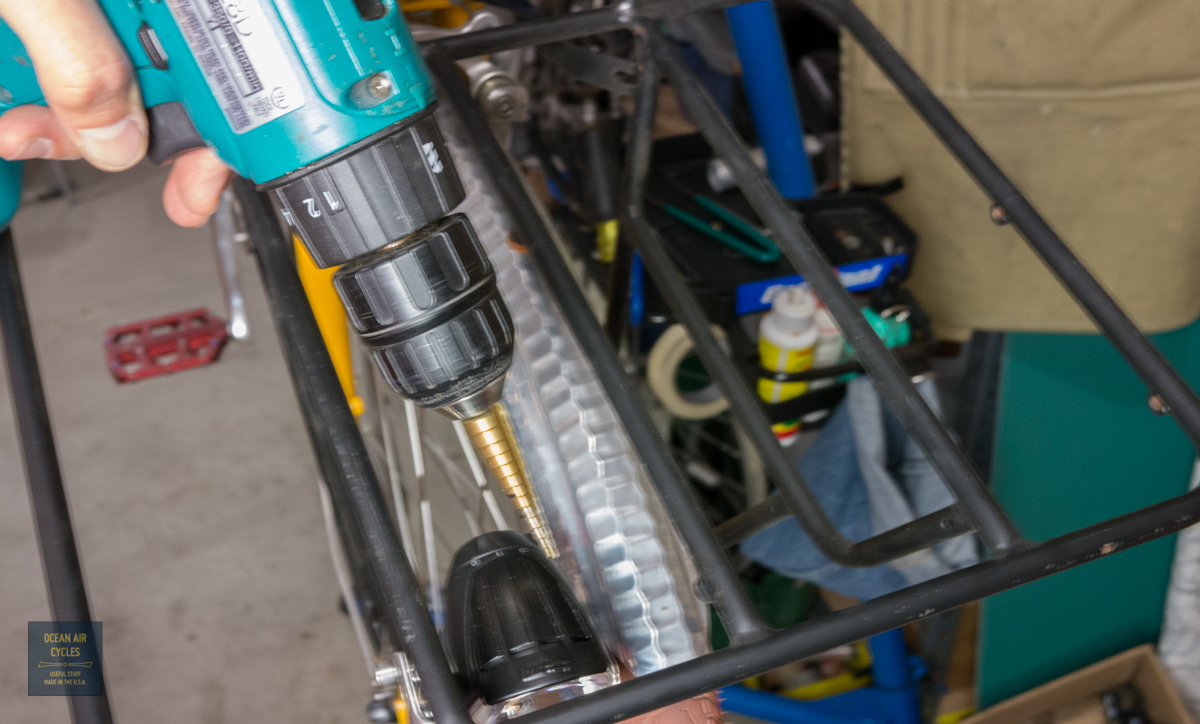
This includes you tire, the light, possibly the rack and any other accessories that may be in the way.  If you get lazy and leave stuff in the way you have a high risk of wrecking stuff, it is not worth it, trust me.

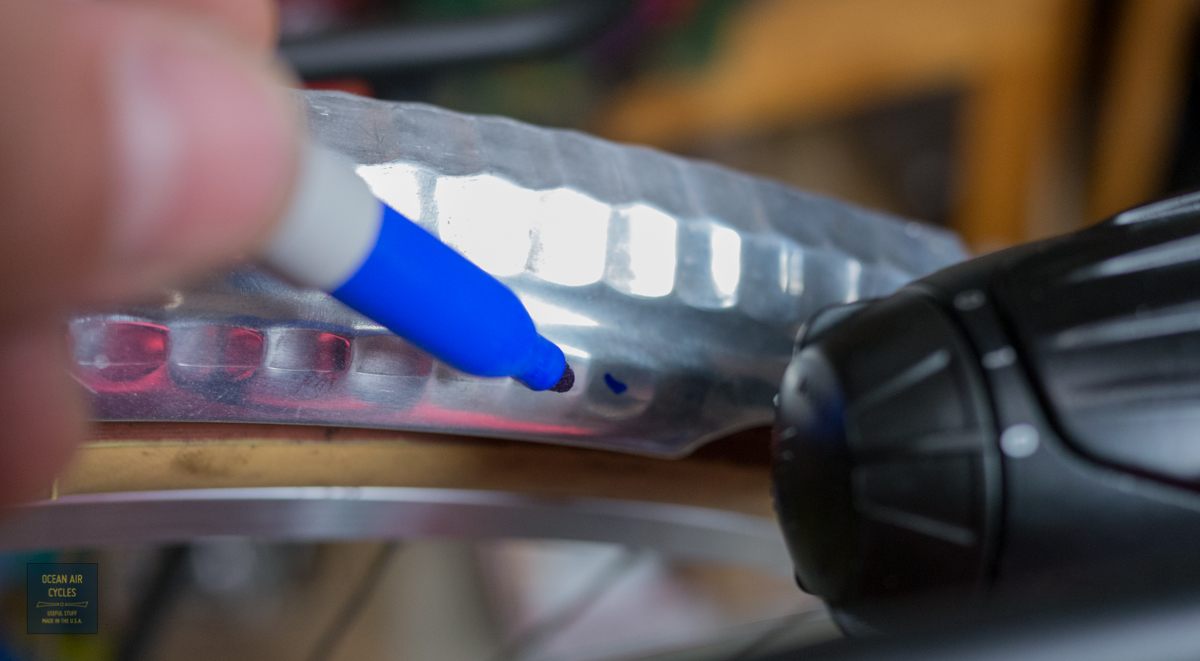
With everything you need stripped off, use the marker to make a mark where you want the holes.  With lighting wires there is a bit more margin on the location.  Mounting holes need to be precise.  Taking the time to make the mark forces you to take a second and think twice (or more) about where you are making the holes

1.25 holes-1040553 1.25 holes-1040552
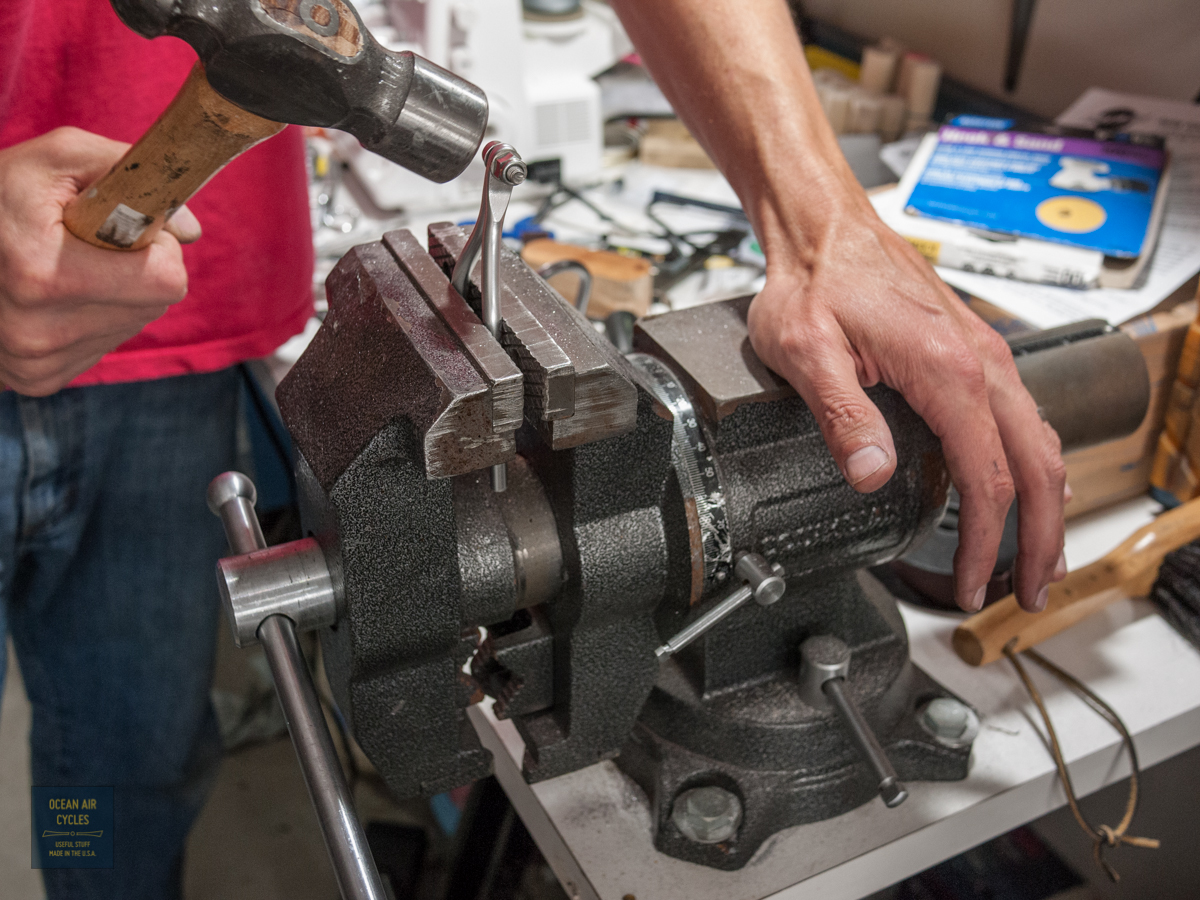
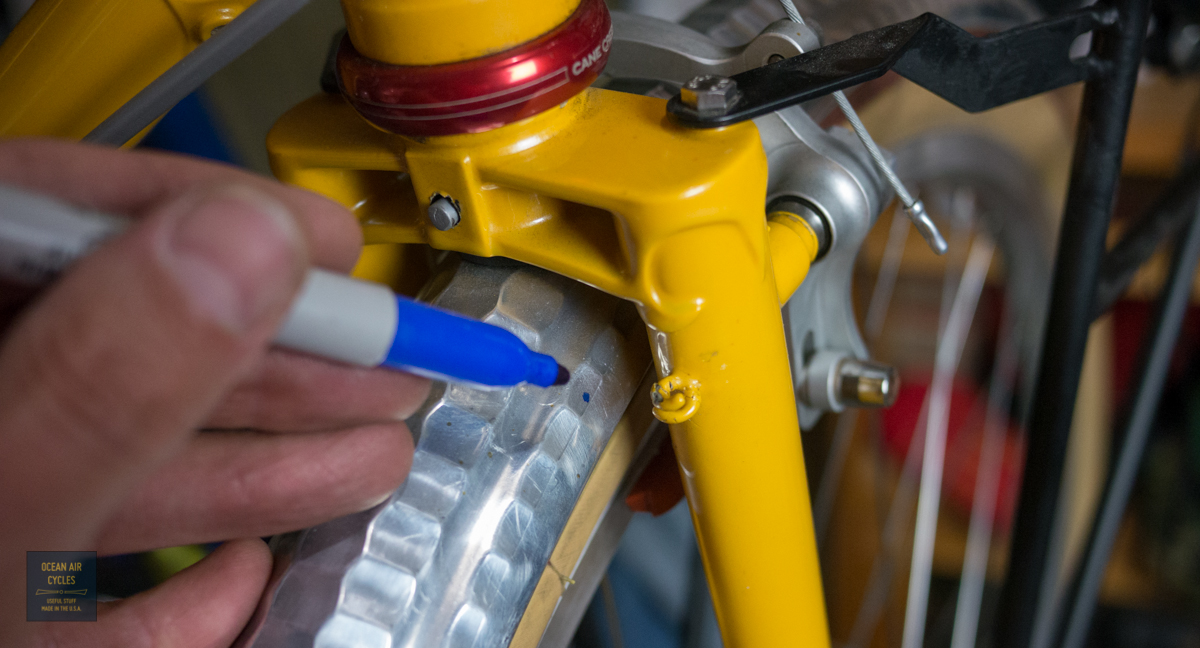
Once you are sure of the hole location use your center punch to make a small indent in the place you want to be the center of the hole.  The indent will help to keep the drill bit from running all over your fender at the start of drilling.  When you make the indent with the punch be sure to support the fender from behind with you hand and the block of backing wood.

1.25 holes-1040558Without support from behind, the indent you make with the punch could end up damaging the fender more than intended.  If you do not have a spring loaded center punch a sharp nail can substitute, but you may need a second set of hands to keep everything supported.

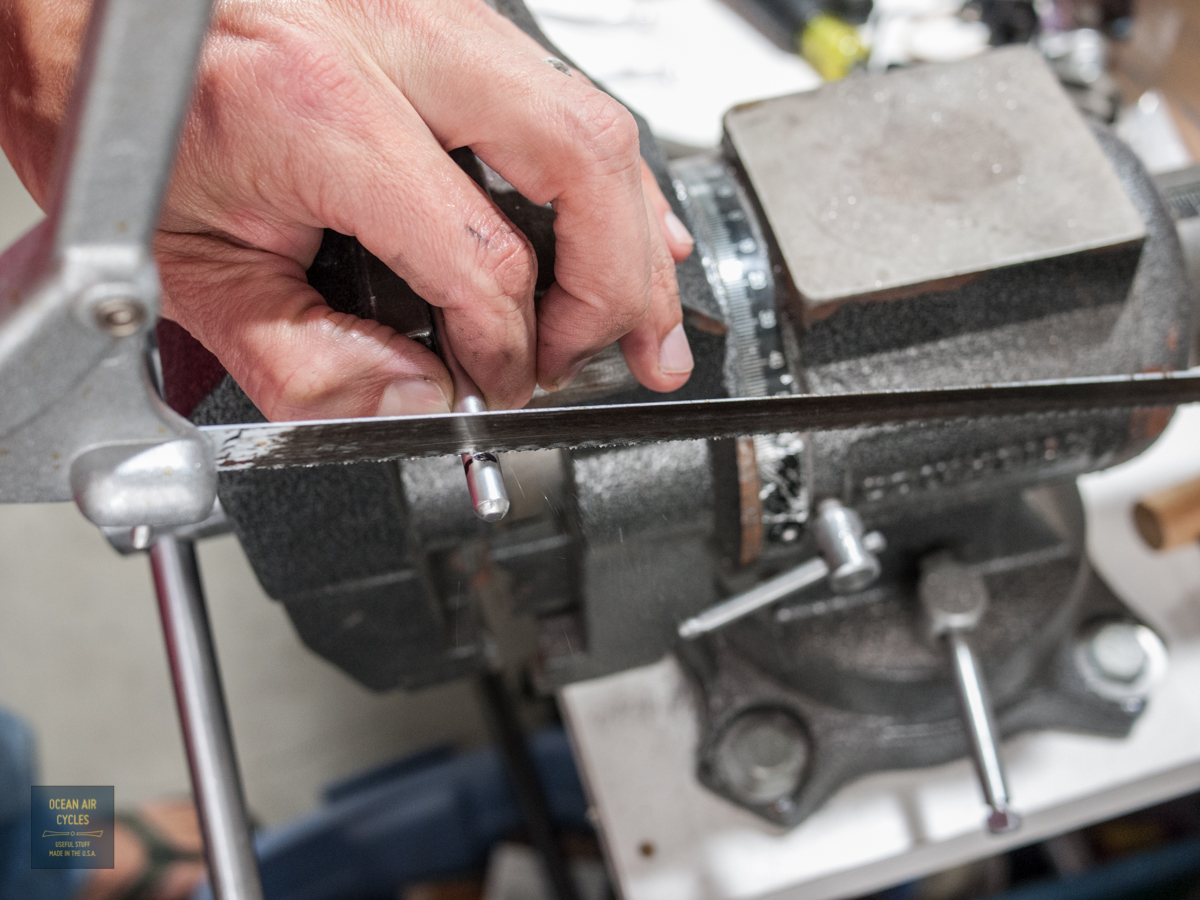
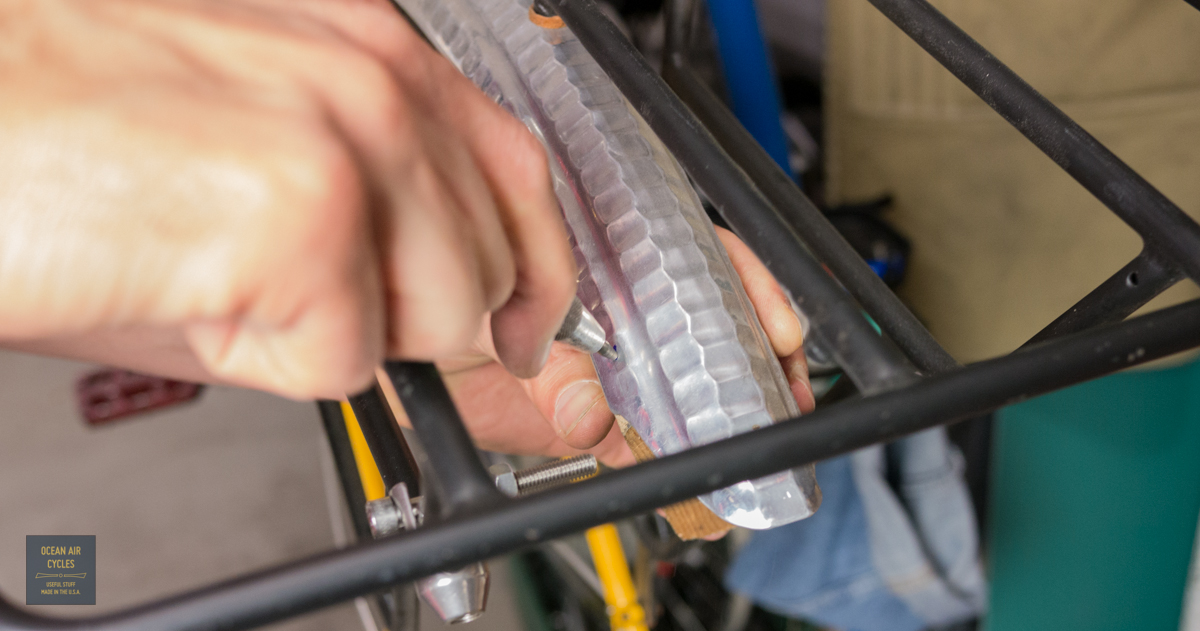
It is time to drill.  If you have the step drill this will go a bit easier.  These are made specifically for sheet metal and the way they take incremental cuts, as well as the shape of the cutting edge help to reduce the pressure needed to make the hole cut.  If you are using traditional drill bits be sire to start with a small bit (hole), then move up to a bigger bit.  Also be sure to back the hole with a wooden block.

1.25 holes-1040559
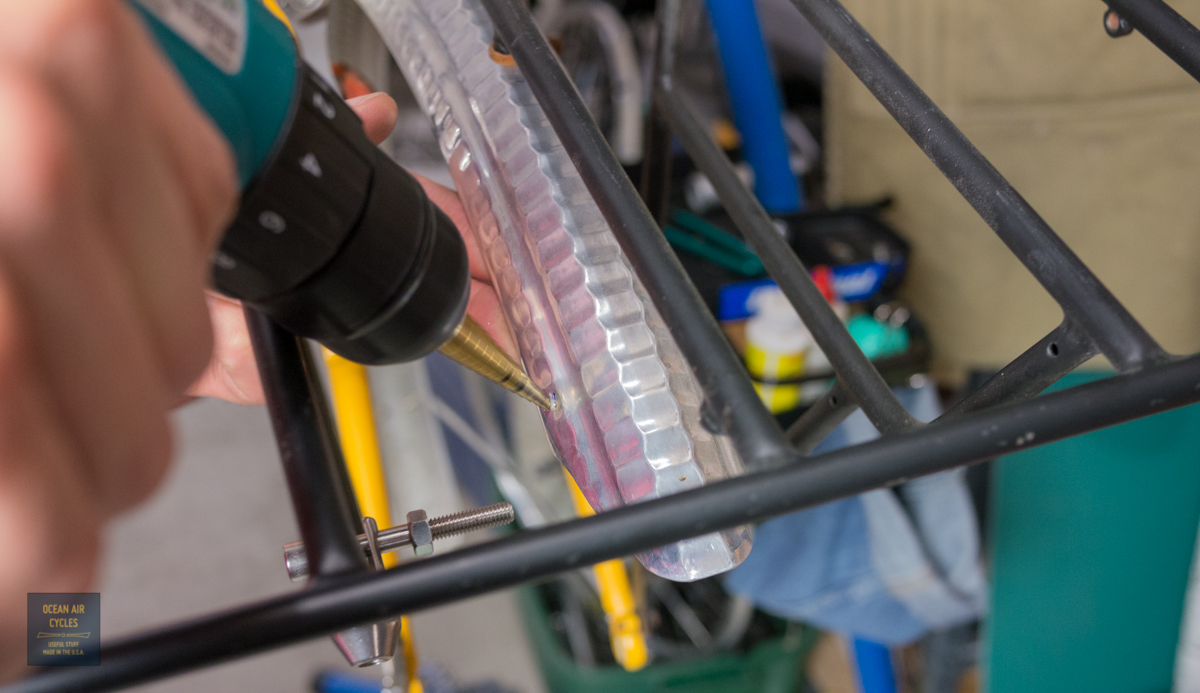
With the step drill you do not need the wooden block and things are a bit easier.  You can see the black lines I made on the bit.  These mark the diameters where I want to stop.  The black line makes it much easier to see on the spinning bit.

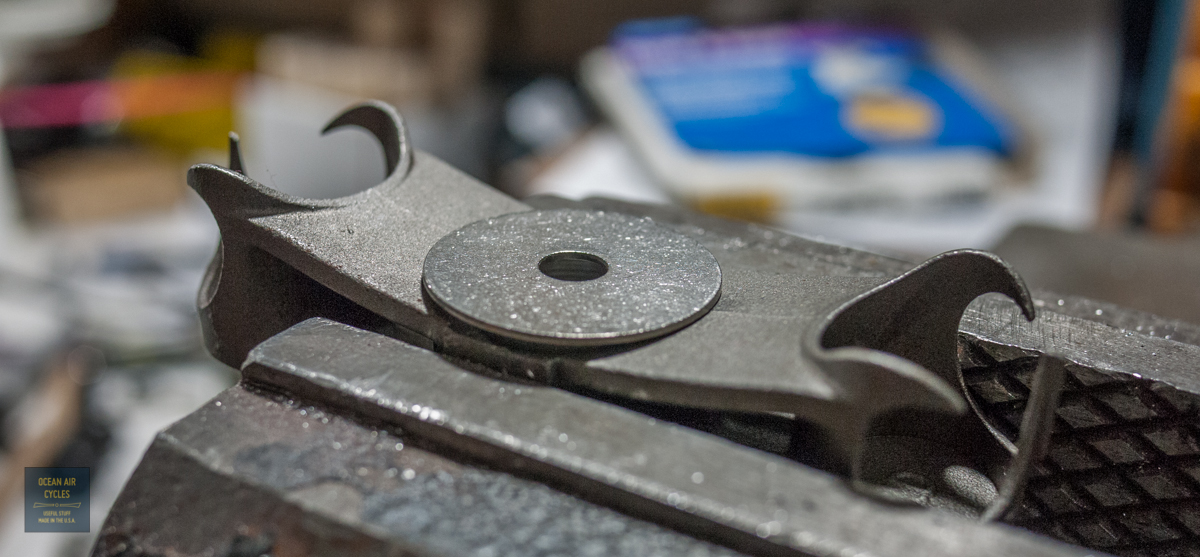
This is what the hole should look like.

1.25 holes-1040560
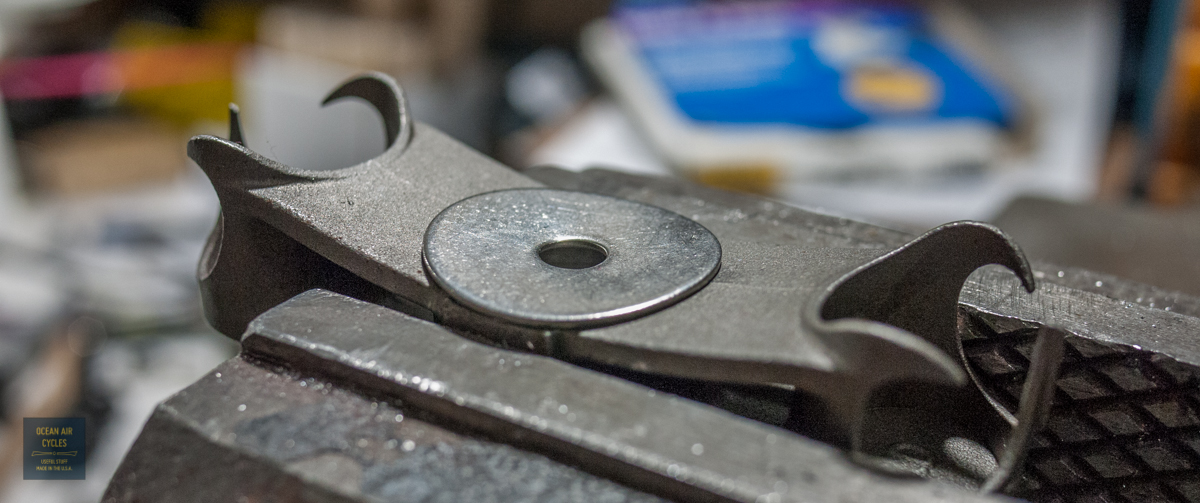
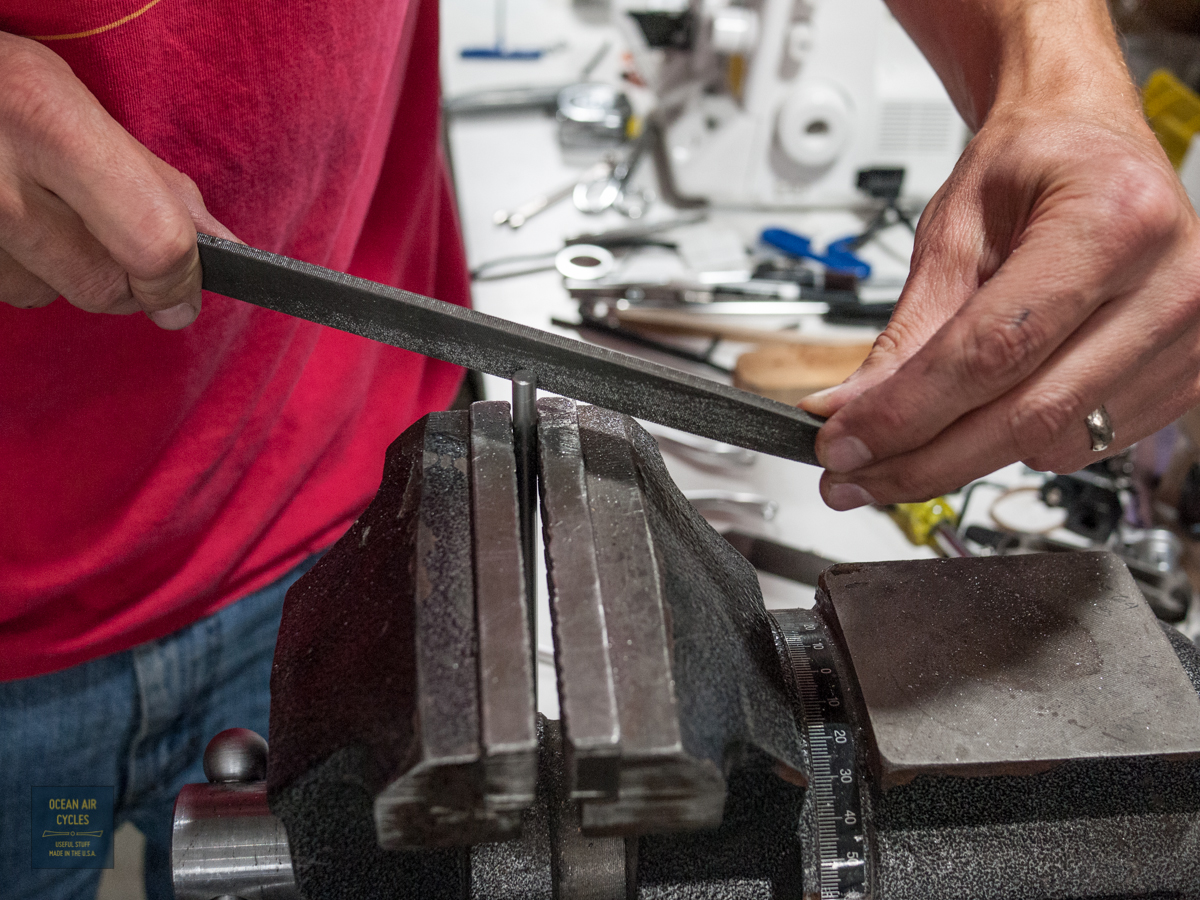
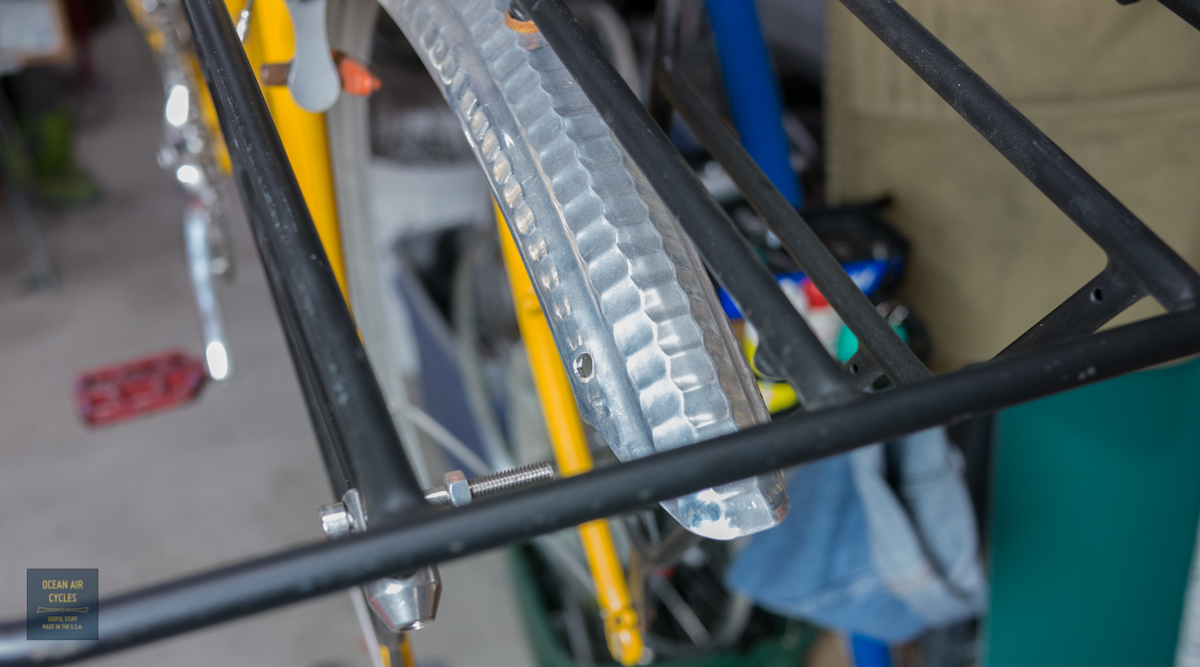
Nice and round, a tiny bit smaller then the final hole you want and there will be a metal bur around the edge.  You can either use your countersink by hand or the round file to gently de-bur and clean up the edge of the hole.  I am using the file in the picture below.

1.25 holes-1040561
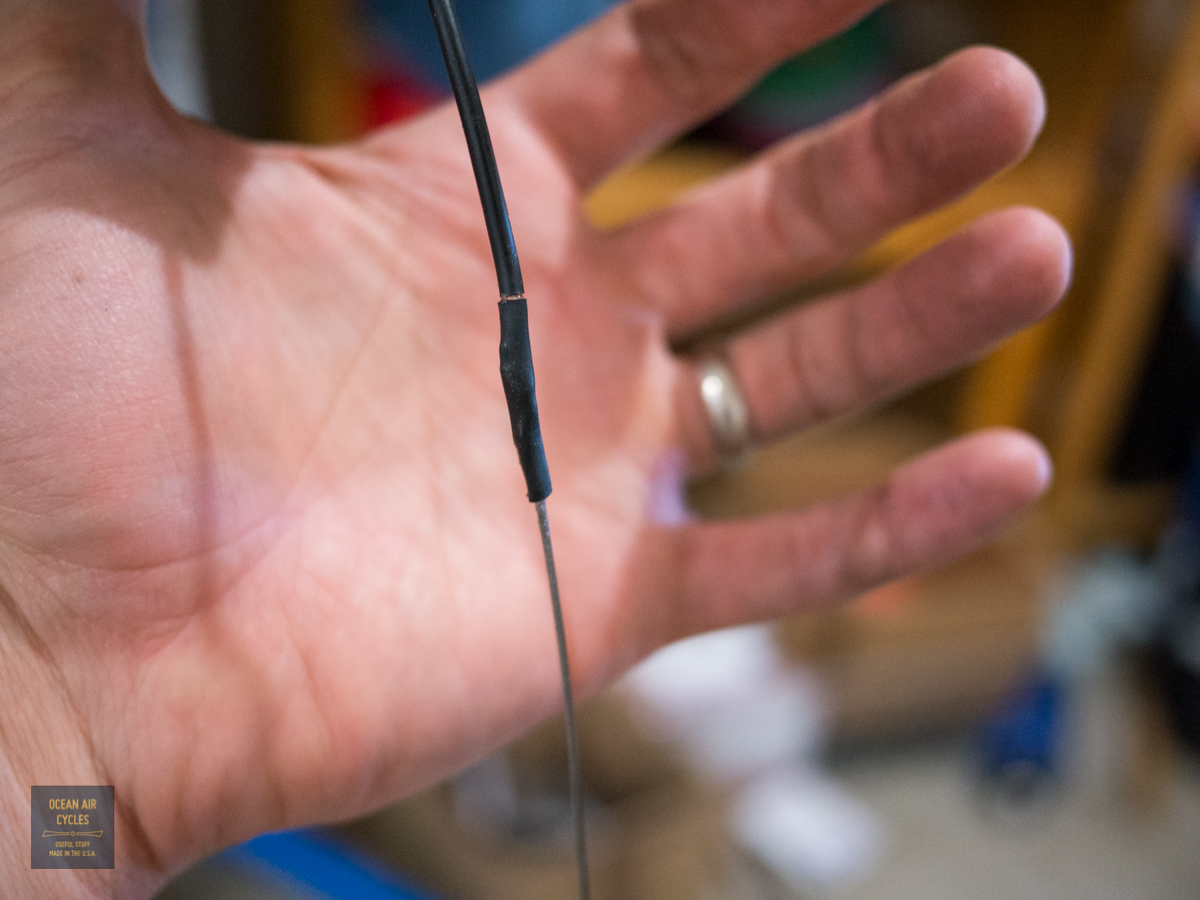
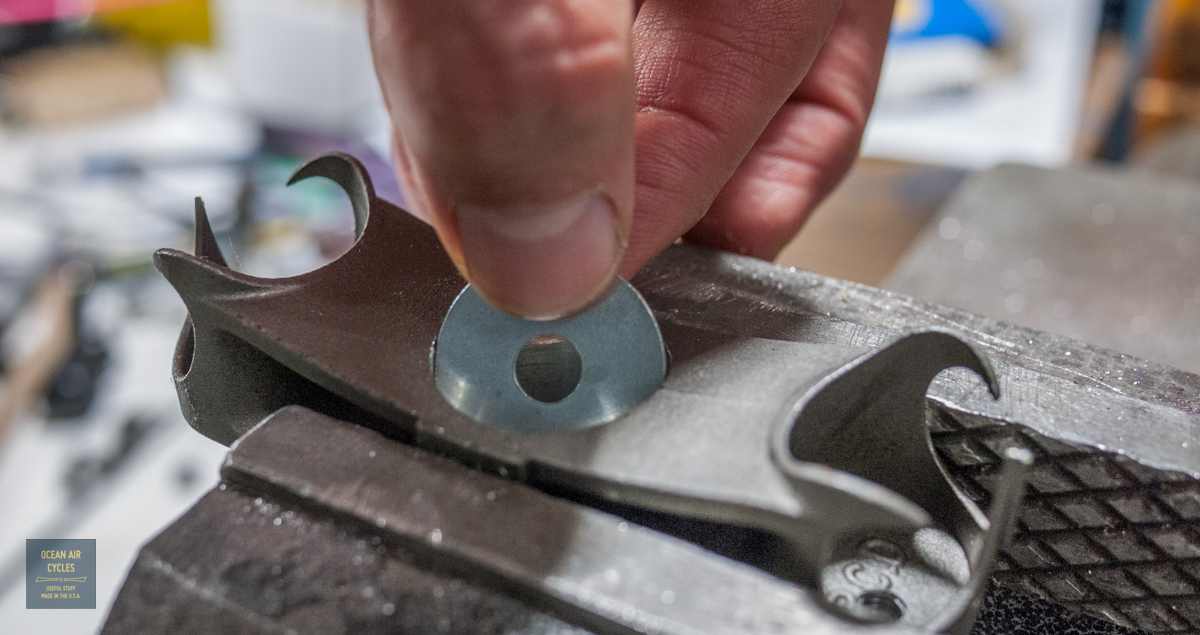
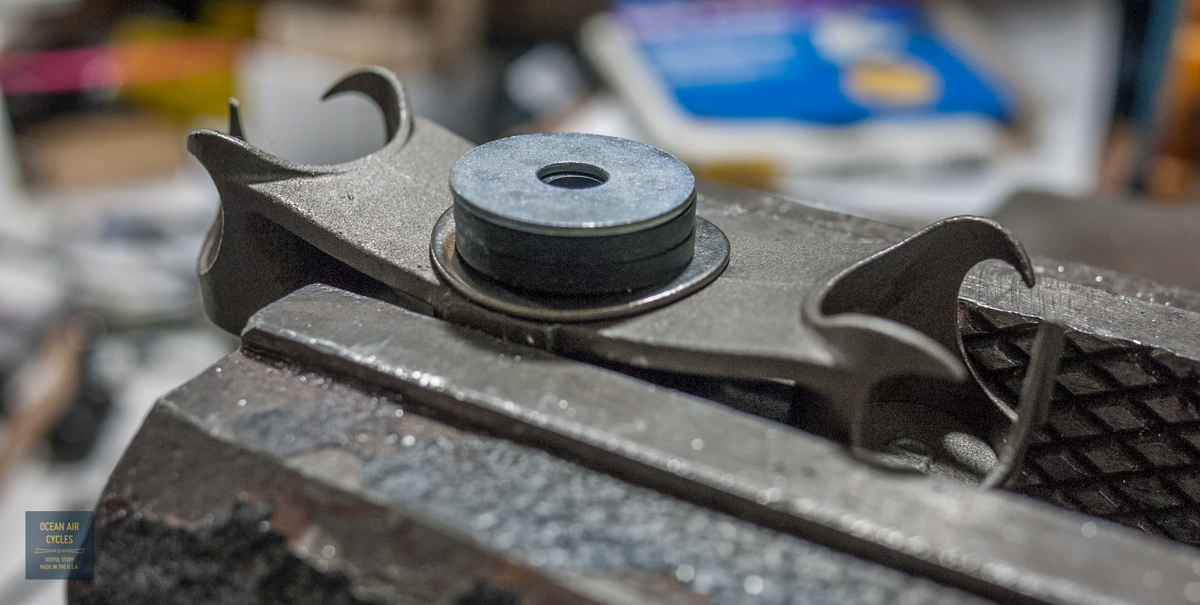
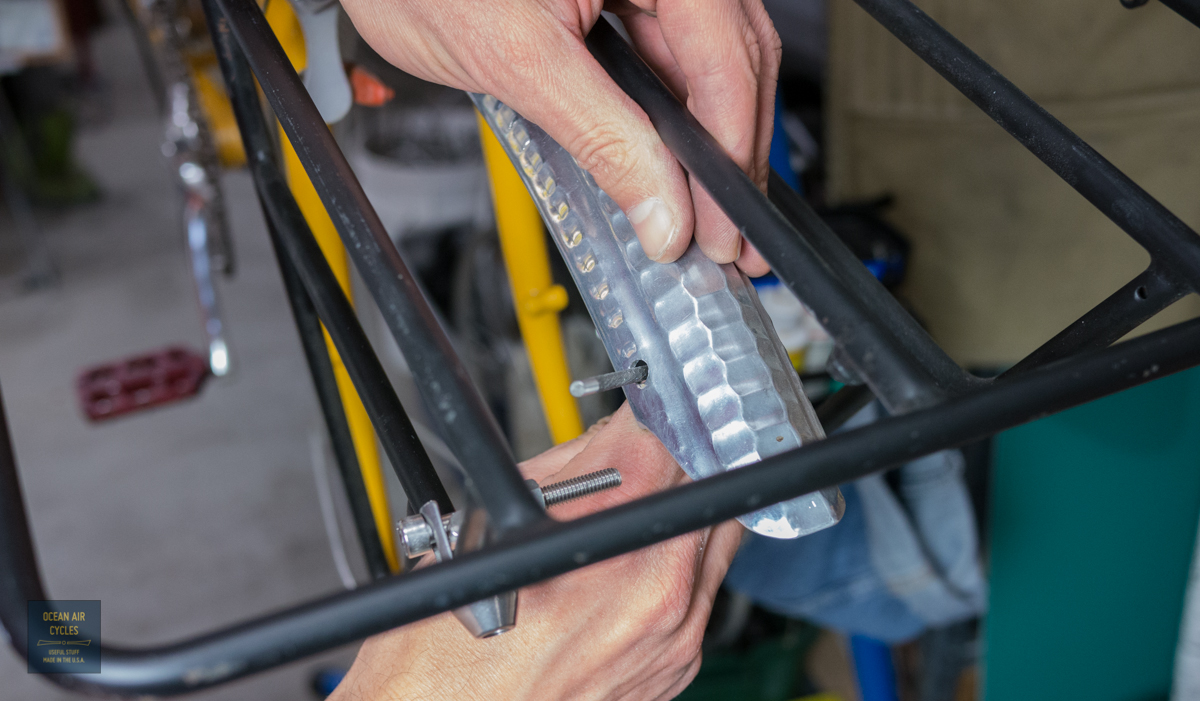
With the hole tuned up it is tie to push in the stress relief grommet.  If this were a mounting hole it would be done.  THe stress relief grommet protects the electrical wire from the sharp edge of the hole.  Even with the edge filed smooth, the wire would likely wear through and fail from the vibrations of riding.  The grommets can be bought in a variety of sizes at you local hardware store.  They are usually found in the electrical section.  They are shaped like tiny doughnuts with a groove cut in around the edges

1.25 holes-1040569Every time I hold one I think of it as a tiny Death Star with Luke flying around the trench in an X-Wing.  Yes that kid is alive and well in all of us I hope.

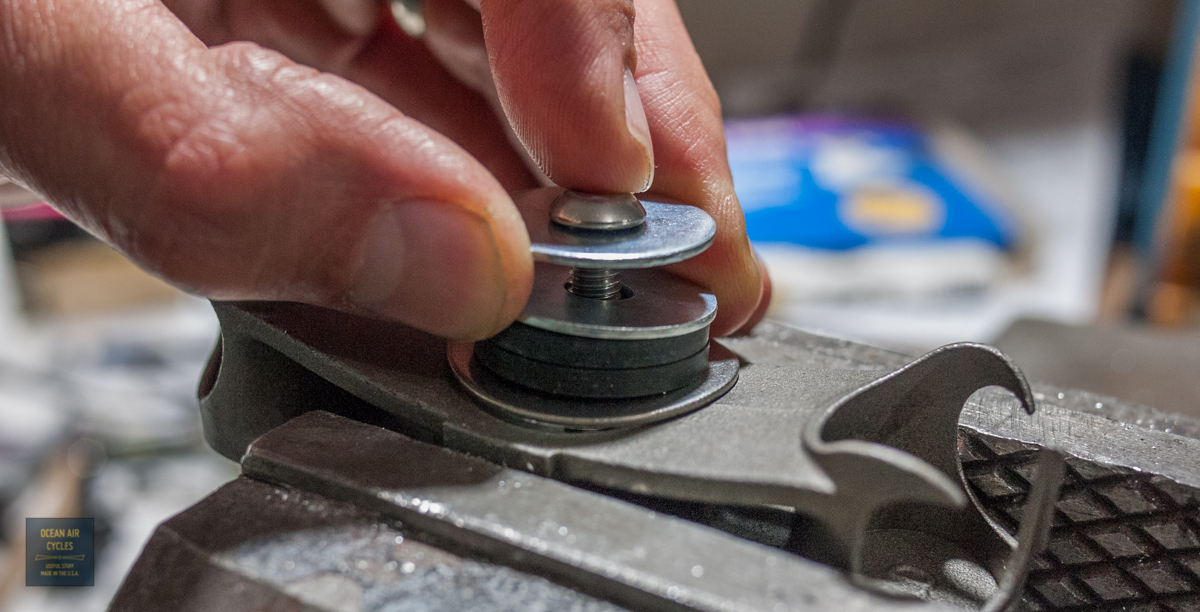
Push the grommet into the hole and work around the edges on moth singes to make sure that the grommet is centered with the top and bottom fully sandwiching the metal of the fender.

1.25 holes-1040562 1.25 holes-1040563
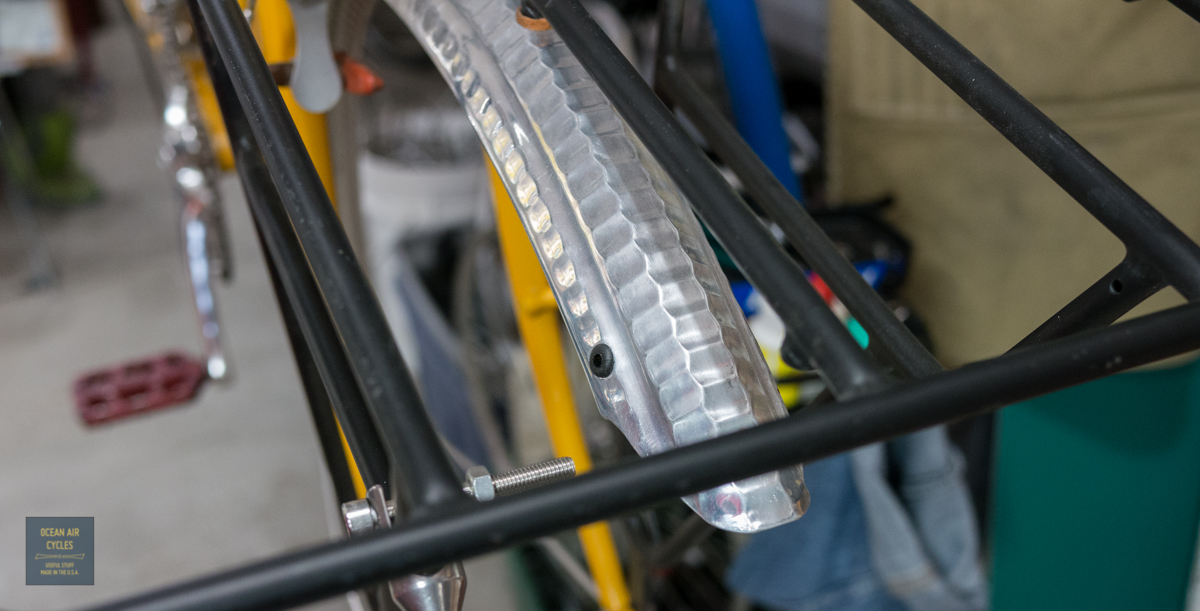
It should look the same on both sides, none of the lip caught in the hole.  If you were lazy with the de-burring it will likely have taught your finger tips a lesson when working the grommet into place.

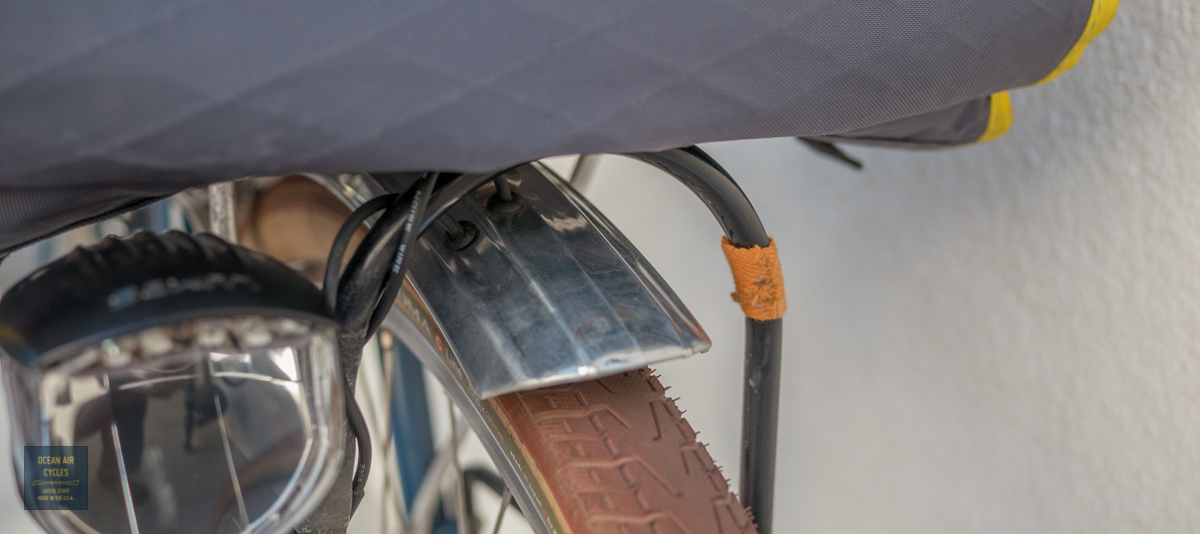
The hole is now ready and safe to pass your wire through, finishing off the rest of your lighting install.

1.24 secula WP-1040504If I were to insert this much detail into a single post it would end up incredibly long.  I will do my best to expand steps like this where needed.  Later this week there may be a post on grommets alone.  Eventually I will cover wire terminations, and a bunch of other stuff that I take for granted.  I was lucky to grow up in a mechanically inclined environment,  then back it up with an engineering education, time in machine shops and countless hours keeping mechanical things running.  This is my chance to share the knowledge.  If at any point you think I jumped a step or need to explain something in more detail, hit me with a comment or message.

Because much of this is second nature to me there will be things I skip, like eye protection.  Not that I skipped it, but forgot to write it out.  Eye and face protection are no joke when working with metal.  Metal bits in your eye sucks, really bad, trust me.  I usually wear a full face shield, it is easy and keep thing from getting in any of your head holes.

Now have fun punching holes in your perfectly good $100 plus new fenders, in the long run you will be happy with them.

New Secula Tail Light

As part of the recent rebuild of my personal Rambler I included a new dynamo powered tail light.  THe B&M Secula is looking to be one of the better options for 2014 and I wanted some first hand experience with set up and performance.

1.24 secula WP-1040488My previous go to light was the B&M Seculight, also a good performer and better than many battery powered lights on the Market.  The Secula implements what B&M is calling LineTec.  The LED shines into a thick prismatic lens distributing the light across a wider angle of view.  Initial bench tests look quite promising, and I am looking forward to getting this out in the dark.

One thing I never noticed with the older B&M packaging was the direct intent to be used as a hole template for drilling the fender mounting location, this worked out nicely.

1.24 secula WP-1040489 1.24 secula WP-1040490 1.24 secula WP-1040491Everything went together well as a standard fender mounted tail light would.  The only thing that bothered be a bit was the wire routing out of the fender to the bottom connection points.  The design intent is to use a common hole for the alignment prong on the light base and the wire pass through the fender.  As a rule I always use a relieve grommet on the holes to ensure the wire does not get cut over time.  This led to a space conflict as well as the light base no longer following the curve of the fender.  I resolved this by cutting a small section out of the relief grommet as well as shimming the mounting bolt with a round leather washer.

1.24 secula WP-1040496It all pulled in flush and snug.  I replaced the stock nut with a nylon lock nut and trimmed the bolt a few thready to maximize tire clearance.  It all came together well.

1.24 secula WP-1040501Through frame wiring was a breeze.  I use an old derailer cable butt spliced to my dual conductor wire with the glue filled shrink wrap as a wire fish.  All wire runs are through the frame or inside the fenders with the wires tucked into an edge.  The exposed run from the seat tube to the rear fender is secured with a short piece of cloth tape.  THe front fender had been previously drilled for a head light only.  For this build I opted for a second set of holes.  On new builds I generally use a larger hole and grommet to accommodate the two wires.

1.24 secula WP-1040495

1.24 secula WP-1040506 1.24 secula WP-1040504 1.24 secula WP-1040503My personal Rambler is finally reflecting the complete vision of what a Rambler is meant to be.  There are a few details like the bottle cages to take care of still.  My Rambler will also be the test bed for rack and bag projects, so matching there may never happen.  Overall though I am thrilled with the way this build came together

1.23 almost FL-1040499

Front Fender Tips

There are more than a few ways to mount the front fender to the crown of the fork, ranging from the modern angle bracket to the vintage daruma bolt.  Most of the common solutions involve a joining piece of some sort that holds the fender to a bolt running through the fork crown.  All of these work well with Ramblers and are safe and good when properly employed.

I have been using an alternate method for a while now with great success.  Common star fangled nut is mostly used to preload the headset in threadless steerer assemblies.  This same nut can be inserted into the bottom end of the steerer and used as a fender attachment point as well.  The bottom end of the steerer has a smaller inner diameter than the to for added strength in this highly stressed area.  The standard 9/8″ star nut may be tight and the 1″ star nut a little loose.  I prefer to adjust the blades of a 1″ slightly outward, but the 9/8″ gets the job done with a bit more insertion force as well.  The standard star nut insertion tool is designed to slip over the top of the steerer tube, and will not work in this application.  I thread in a M6x60 bolt and use it to steer the nut in with careful hammer taps.  I set the nut in about 5-8mm deep and remove the bolt/insertion tool.

10.29 Fender tips WP-1140771 10.29 Fender tips WP-1140772The next hurdle is the washer stack between the crown and the fender.  May fender mounting kits are designed around a 1″ steerer, and the included top washer may be to small to seat well against the 9/8″ steerer bottom on a Rambler fork.

10.29 Fender tips WP-1140845I replace this washer with a 1 1/4″ fender washer.  A gentle tap or two with a hammer against the crown will shape the washer to the curvature of the crown for a nice even fit.

10.29 Fender tips WP-1140846 10.29 Fender tips WP-1140847The gap at between the crown and fender is a few mm on the generous side to ensure maximum clearance between tires and fender.  This is easy to adjust with an extra rubber washer or two.  For 38mm tires I generally use two 1/8″ rubber washers.

10.29 Fender tips WP-1140848Last in the stack is a 1″ fender washer between the rubber and the metal fender.

10.29 Fender tips WP-1140849The entire sandwich is then held in place from the bottom with a M6 bolt and a 1″ fender washer on the inside.

10.29 Fender tips WP-1140850This assembly has held fast on both older builds and recent Ramblers in the past year.  As added insurance one could add locktite to the treads of the bolt.  Also, as with all fastener based mounting systems, e.g. nuts and bolts, it is a good idea to check them regularly for any hardware that may be loosening in use.

The above washer stack will work with most daruma bolts included in fender hardware kits as well.  The fender lower strut mounting is straight forward and will go together per the manufacturer’s instructions.

If you are riding rough road or dread the occasional rattle, you can add a third fender mounting point at the front rack.  This will greatly improve fender stability, and is good insurance should one of the other mounting points come loose.  There is no straight forward way to do this, short of a custom rack, and most if not all solutions will require a bit of ingenuity and a trip to the hardware store.  Here is my combo of an unused fender mounting bracket and the Mark’s rack front tab.

10.29 Fender tips WP-1140348All of the above hardware can be found at your local hardware store, preferably the small sort with a well stocked hardware selection.  I have been thinking about adding the above listed small parts to the storefront as a “kit”, let me know if there is sufficient demand, and I will make it happen

Mounting Mark’s Rack on a Rambler

At the current time the Mark’s Rack made by Nitto is the best option available for fitting a small front rack to your Rambler as a bag or basket support.  It has all of the hardware needed to mount and only needs the struts trimmed and slightly adjusted (bent) to fit the four point mounting system perfectly.  The Mark’s rack is really a supreme value in quality and strength, yet versatile.  Having one in your parts bin is always a good thing, they can be adapted to front or rear mounting on most bikes.  When you buy one, this is what the standard kit looks like.

10.28 Marks Rack WP-1140817Step one is stripping off everything but the four round mounting struts.  Save all of this hardware for future projects as it is some of the nicest you can get your hands on.  Next loosen the strut draw bolts, 10mm wrench, a bit so that you can move the struts without everything falling apart.  Mount the two front struts to you mid fork rack mounts with M5 bolts while holding the rack in its approximate final position above the front fender.

10.28 Marks Rack WP-1140791Gently tighten things into place so that approximate trimming needs can be determined.  At this point you can also see about how much bending will be needed for the rear struts. Note the orientation of the struts.  It can help to mark the inside, or direction of future bend.  Once bent the struts are not the same, but mirror images of each other.

10.28 Marks Rack WP-1140793Mark each of the struts for trimming.  Remember you can always cut or file a little more off, but never put the metal back.   In general I leave about 1cm of strut beyond the draw bolt for fine tuning fit.

10.28 Marks Rack WP-1140794Now dis assemble everything, careful not to lose any of the small parts.  The draw bolt washers and struts will likely have you proving that gravity is indeed still working at least once during the install.  Carefully clamp the strut in your vice.  Soft jaws or a rag wrapped around the strut are optimum, but judicious clamping force will get the job done without marring the struts.  I use a hacksaw to make the cut.  Again, it is always easier to take more metal off than put it back.

10.28 Marks Rack WP-1140795

Next file the rough cut end flat, the file a bevel on the edge.  For added detail it is nice to sand the end with fine grit and the matte finnish will be uniform.

10.28 Marks Rack WP-1140796Once all four have been trimmed, it is time to bend the rear struts.  Bolt them together at the end with a M6 bolt, nut and two washers.  This will keep them in alignment during the  bending process.

10.28 Marks Rack WP-1140797Back into the vice, clamped just below the factory s-bend,  with intended bending direction noted, it is time to move some metal.  The force needed to cold set is less than you probably think.  Work up to it, while you can bent them back the other direction a bit during final tuning, too much back and forth will wreck the strut.

10.28 Marks Rack WP-1140799If things go fantastic you will get it all perfect on the first pass.  Chances are that you will start back at the top and go through the process at least one more time to get the fit dialed in.  That is why we leave a bit of extra metal on the struts.  his is what it should look like as things come together.  There is a sweet spot between tight and loose with the draw bolts and mounting bolts where you can adjust the position of the rack in 3d space with out everything coming apart.  The goal is to have the struts cold set such that there are no spring forces in the mounted struts.  This will help to extent the fatigue life of the system.

10.28 Marks Rack WP-1140800 10.28 Marks Rack WP-1140801For the final tightening, use one of the included split washers between the bolt head and strut.  Clearance above the fender should be close, but not so close that movement of the fender results in a rattle.  If desired one can make an angle bracket to connect the fender tip to the rack for added fender support.  Here it is all together with a headlight mounted.

10.28 Marks Rack WP-1140813 10.28 Marks Rack WP-1140812This will work equally well on 700c and 650b Ramblers.  The distance between the upper and lower fork mounting points is consistent and thus the rack position follows the same.

In the near future we will be offering the mark’s rack through our store front with the above adjustments made to the struts.

Upper Porteur Mounting

Earlier we had talked about fitting the Porteur racks at the front dropout, and today we will be showing how to get this done up at the top.

This is another area that we feel the current racks on the market fall a bit short.  Most of the commonly available racks, VO, Soma etc, are designed to work with a single tang connected to the center of the crown.  This works, but not as well as it could.  It leaves the rack a bit wiggly, and leaves only one chance for loose hardware to become a really big problem.  We designed the Rambler with dual mounts at the crown.  This provides engineering redundancy in the  mounting as well as greatly added stiffness.  The fork crowns with this mount are open to all, this is not something we invented, but hope that will become widely adopted.  The downside to this is that the current racks on the market need a bit of adaptation to integrate with the improved mounting.

Our first solutions involved the addition of struts welded in place.  This has worked very well and if you have access to somebody with the metal fabrication skills needed to make this work I would recommend going this route.

10.17 prack mt up-1100660We realize that not everybody putting a Rambler together at their home workshop or even having their local bike shop buildup their Rambler has the resources to do this.  While searching for a suitable hardware, nuts and bolts, solution we were turned on to  the hardware kit sold by Surly for their rear rack.  This has proven to work quite well, the struts included in the kit only need a bit of bending and trimming, and it all bolts right up.

10.17 prack mt up-1140681 10.17 prack mt up-1140721 10.17 prack mt up-1140722Like al bolted hardware on a bicycle this will need to be checked regularly, but in practice has proven to be quite robust, and will work with all of the commonly available racks on the market.

Our long-term goals include the development of our own racks as well as partnering with existing producers to help their future racks work with this system that is both safer and more stable.