I took a time out in the shop this morning to make some new light brackets. The only thing better than caffeine in the morning is jumping out of bed and making an idea into reality with your hands, at least for me. The idea of chain ring light brackets is not new, a little google-fu will get you some results like this:
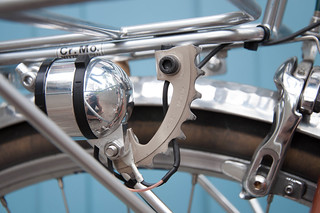
Working from this as a starting point, I went through my piles of old chain rings and decided that the diameter of chain rings in the mid to high 20’s best matched the shape of the headlight. After a bit of cutting, filing, and polishing this is what I came up with:

I am pretty happy with the way they came out. Both lights will be mounting to a Nitto Mark’s rack, in different ways, so I made two different length brackets.
Backing up a bit for those not familiar with these types of lighting systems, one is likely to ask why even make a bracket? Why not just mount it upside down? The lights are made with a fairly advanced optic that focuses the light in a rectangular beam with a cutoff that keeps the light on the road and out of the eyes of oncoming traffic. The optic housing interface is further designed to be most water-resistant in the upright orientation. This all works out fine for 90% of the intended audience who mount these lights to the fork crown of an average city bike. The challenge starts with the crown mount location when you use a front bag or basket. The lights beam is obstructed in the competition for real estate. So a bracket needs to be used to move the light under the rack and forward so that the light is not blocked by the front wheel or hanging out in a spot where it can be easily damaged. Surprisingly there is not much on the market to solve this problem.
I am waiting for some additional hardware to be delivered so I can keep this project moving. Later in the week I should have this much further along.