I woke up at my “regular” 4:30 AM for the first time since Daylight saving time started this year. That meant that #coffeeoutside could actually happen, and be break after a couple hours of work was on the clock. A great way to kick off Spring
Ocean Air Cycles – Click to Shop
Bicycles and Gear for Going Places Near and Far Self Propelled With Comfort and Speed
Bunyan Velo is an online magazine dedicated to the beauty and the story of bicycle travel. Only out for a year now the latest issue, No.4, was recently released. I have been asking Lucas, the editor, for advertising rates and space for the last six months, and the answer has always been no. He wanted an article. Most of the articles are about grand adventures to far away places, and my big adventure has been family and Ocean Air Cycles for the last two years. He wanted to share my story a bit, how the micro adventures are crammed into the gaps in the day. After kicking some ideas back and forth we settled on the #coffee outside. Cramming a little bit of campaign back into a regular morning.
I am honored to be included in a journal with so many great story tellers, photographers and adventurers. Each issue keeps getting better. Check it out, share it with your friend and spread the word.
The tubeless tire setups common in the MTB world have been slowly starting to creep into the fat tire road bike niche. The benefits of weight savings, running lower pressures and near flat-proofness all translate to some degree. I have been asked, and do not recommend that the commonly available 38-40mm tires be set up tubeless for most riders. The risk of failure is too high for most of us. That said, today I did this:
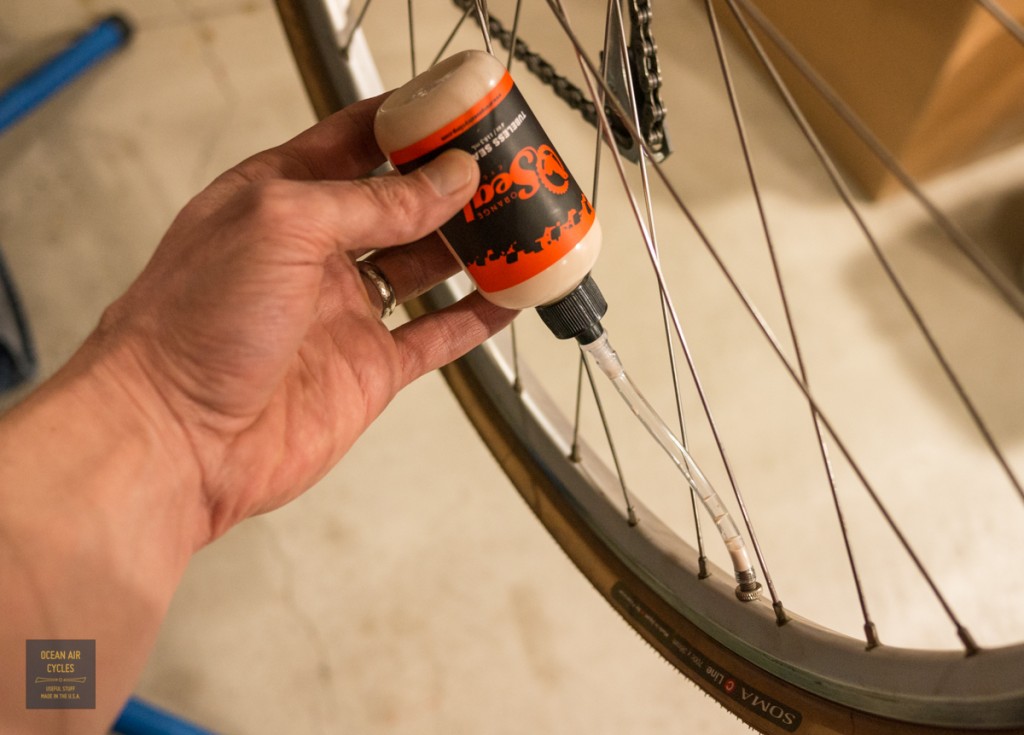 Things are not always what they appear though.
There are a few perimeters that all come into play to make tubeless setups work. Removing the rim from this discussion for now, the tire generally needs a bead that has near zero stretch, and a sidewall/casing with a butyl liner to protect it from the solvents in the tubeless compound. Tubeless setups are generally run at lower pressures for improved traction and comfort. The sealing solution is meant to seal up any small gaps in the system, but also seals any punctures along the way.
That all sounds great for what we want out of our light and supple 38mm tires. I brought this up a few years back while talking with Kirk Pacenti ant NAHBS. He has a strong grasp of tubeless design and had recently launched his 650b PariMoto tire. The first problem is with the tire itself. To make them proper for tubeless they have a butyl liner bonded to the inside of the tire. With large MTB tires this liner is significantly lighter than the tube it replaces. As the tire gets smaller the point of diminishing returns is approached. The available super light tubes weigh about the same (100-120g) as that the liner and a full load of sealant would weigh. The zero stretch bead needed adds further weight. Then there is the pressure consideration. Riders at or over 180 lbs will likely be running pressures greater than 45psi. this pushes the limits of where non-tubless tires will stay on the rim without a tube.
So what did I do to my wheels this afternoon? With the goathead thorn season getting ready to ramp up and some dirt road group rides planned I wanted to add a bit of insurance to my system. I decided to take as much of the good as I could and set up an optimized system for the 38mm tires and my weight (210 lbs). Starting with the Velocity A23 tubeless rim, the secure tubeless ready fit gives a snug fit with the tire bead. The Soma C Line tires are one of the widest, light 380g, and supple 700c tires on the market at the moment. I opted for the super light Q tubes at about 120g each for the 700x 35. This set up alone has been going great for months now. Taking it to the next steep in flat protection I added 2 oz, half the normal amount for a full sized MTB tire of Orange Seal to each Tube. This will add about 70g to each tire, less than standard tube and aramid liner.
The process was simple. Let the air out to the tire, having a presta nut on will help later
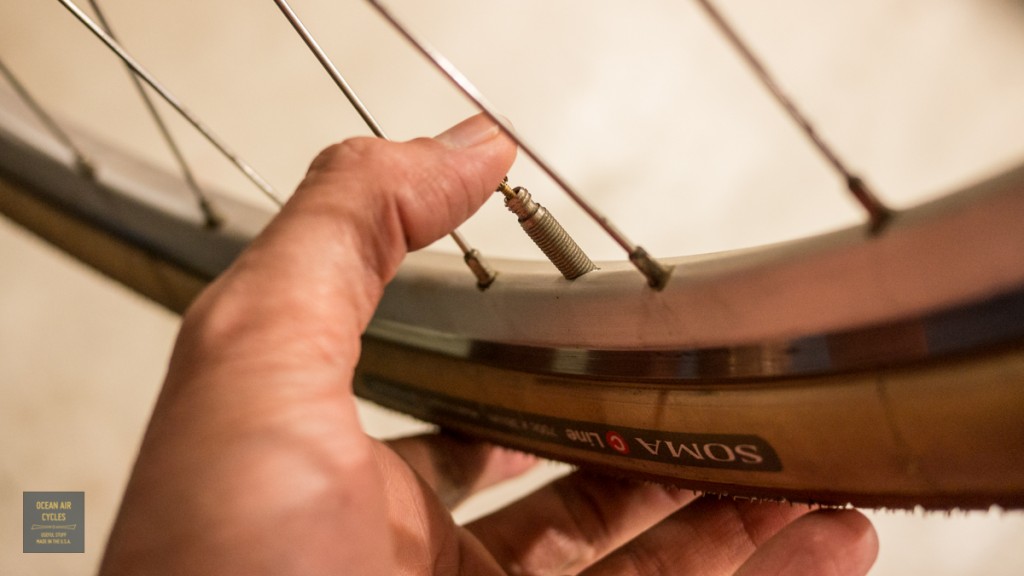 Next up grab a 4mm wrench and remove the valve core from the stem.

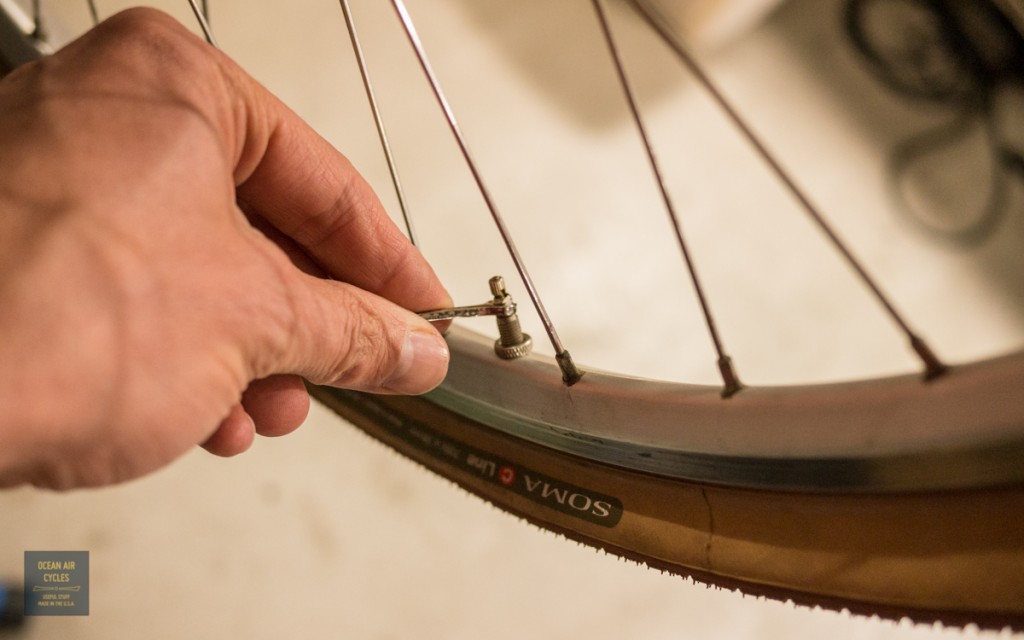 Insert the plastic end of the supplied hose onto the well shaken bottle of sealant
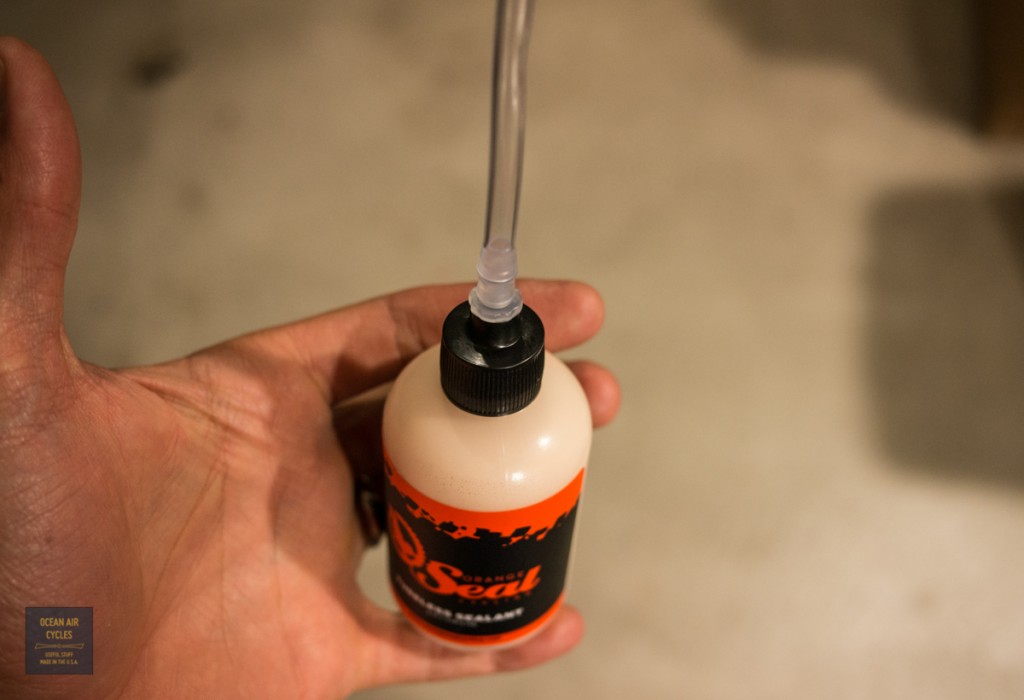 And the other end goes over the stem. Invert the bottle and squirt in about half.
Turn the bottle right side up an detach the hose. Re-install the valve core and inflate to the desired pressure. I keep my C Lines between 55 and 60 psi. Repeat on the other tire and ride. It is that simple.
What are the gains in theory, and how is this different than a basic Slime brand pre-filled inner tube? The whole system is optimized to be light and supple for decreased rolling resistance. The level of safety is high. Time will tell if there is improved air retention and flat protection. The end is a system with all of the good parts of each improvement and less risk to safety.
There have been reports of successful tubeless setups with 42m tires and lower pressures. I suspect the rider weight and load were also correspondingly lower. While there have been successes, there have also been failures. The tires and pressures we are using on “Rando” bikes are close to the margins of safety for tubeless design. The price of failure is high. Failure being the front tire coming off of the rim at speed with total loss of air pressure. While I want improved performance as much as the next rider, I do not think tubeless is the right choice for our needs. I am looking forward to increased flat protection while having the piece of mind that my tire is far more likely to stay on the rim.
The Trek 613 650b conversion I did for a customer just over two years ago has come back to our stable to find a new home. It has aged quite gracefully, and looks better now then it did at the start.
The Trek 613 frame is the backbone for this build. it was what Trek listed as a 23″ frame, and has a 57cm seat tube and a 56cm top tube, It would best first riders with a pubic bone height in the mid 80’s
Everything about this build/restoration met or exceeded the original expectations. There were a few things that worked but need disclosure. The extra long reach brakes stop the bike, but will not induce a skid. This is not really a safety issue but sometimes the nature of these sort of conversions, the bike stops just fine when you need it to. There are some chips and scratches in the paint, no dents. The Suntour Symmetric shifter is gorgeous, but only pulls enough cable to shift through 7 of the 8 rear cogs. The stainless Berthoud fenders have a few small dents, but are solid and crack free. The HT AE-01 pedals are in need of a rebuild, they spin fine, but a rebuild would get you another decade out of them. The original front rack and basket were intended to be a temporary thing, that ended up going the whole time. I was not happy with the mounting and they are not included with this offering. I would recommend the Soma Porteur or Pass & Stowe as the best non-custom replacement option.
On the plus side this is an incredibly smooth and nimble riding bike. Everything is in fine working order to take it home and get riding. It has proven itself both around town and on more then a few mixed terrain short tours. The Brooks B17 Select has restored my faith in current Brooks production standards. There are a few top notch upgrades like the Nitto Technomic stem and Albatross bars, and Brooks Select saddle. The serial Number, dates the bike to 80-81 an fit is in fantastic condition for a bike that age. It is rust free inside and out. All of the bearings are clean and free spinning.
I am offering the bike at $1800 $1500 as seen in the pictures. I have a couple of interested parties, but I am starting a list of potential buyers. While I would prefer a local sale, we can facilitate packing and shipping at a reasonable fee. If the potential buyer would like too use this as a starting point for some other improvements, I would be willing to facilitate any thing you may want, like a new front rack etc. Contact me for a full re-build quote
General thoughts, Trek 650b conversions like this are intended to be ridden with a front load. The handling is great unloaded, but things really stay nice and neutral as you put a but up front. The big difference between this and the Ramblers is all of the details for lighting, better performing brakes and rack mounts. These old Treks provides a fair amount of inspiration for the Ramblers.
This year has started off with a flurry of meetings, and my note taking / business card distribution system was in series need of improvement. It was time to hit the workbench and fix things a bit. The “Scout Books Meeting Wallet” samples are the outcome
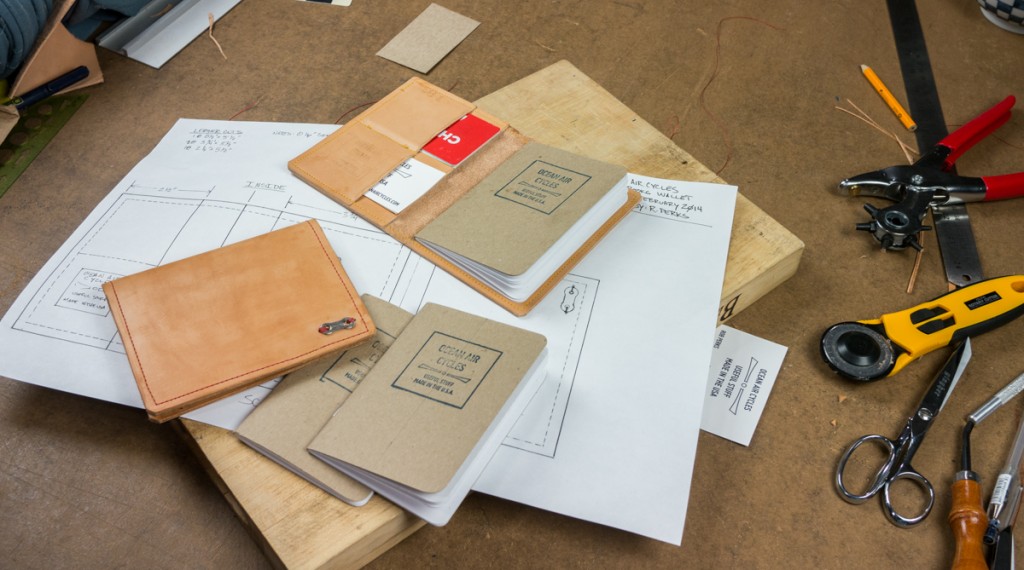 I like the Scout Books, enough to design a wallet around it. The paper is great, fountain pen friendly, recycled, and the whole thing is made in the USA. They get bonus points for building a system that will allow for custom printed journals (another project in the works around here). The wallet is there to add a bit of protection, and hold the other things I need for quick business meetings, card holding slots, extra pocket, room for a writing utensil in the fold etc. I can grab this and go.
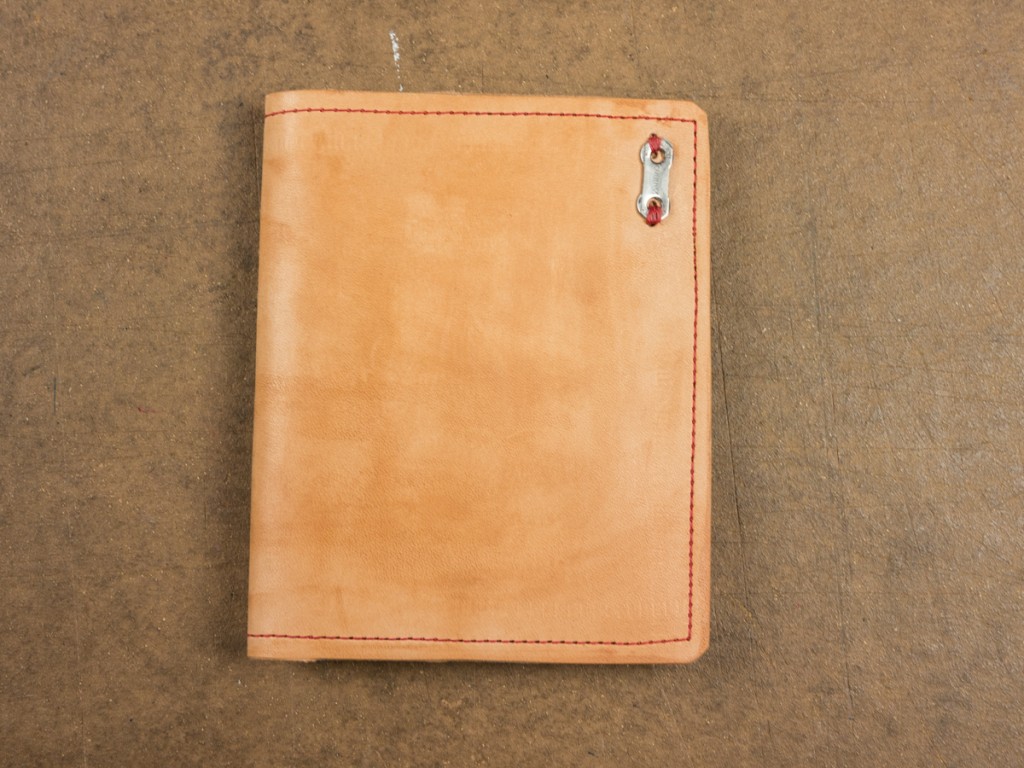
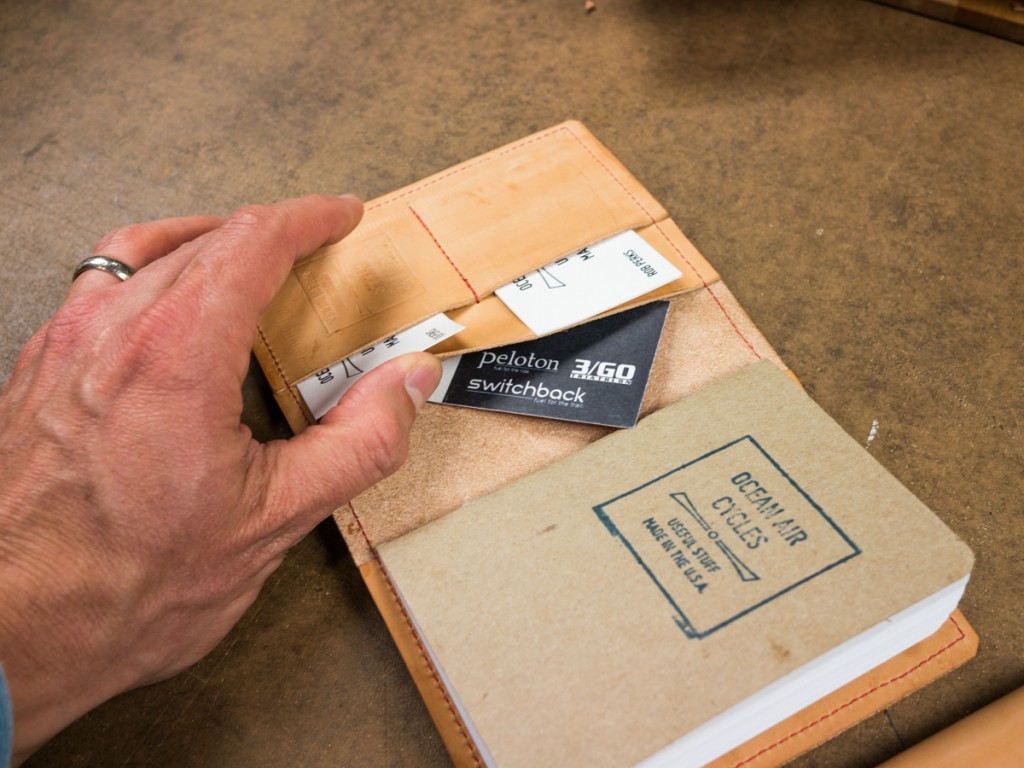
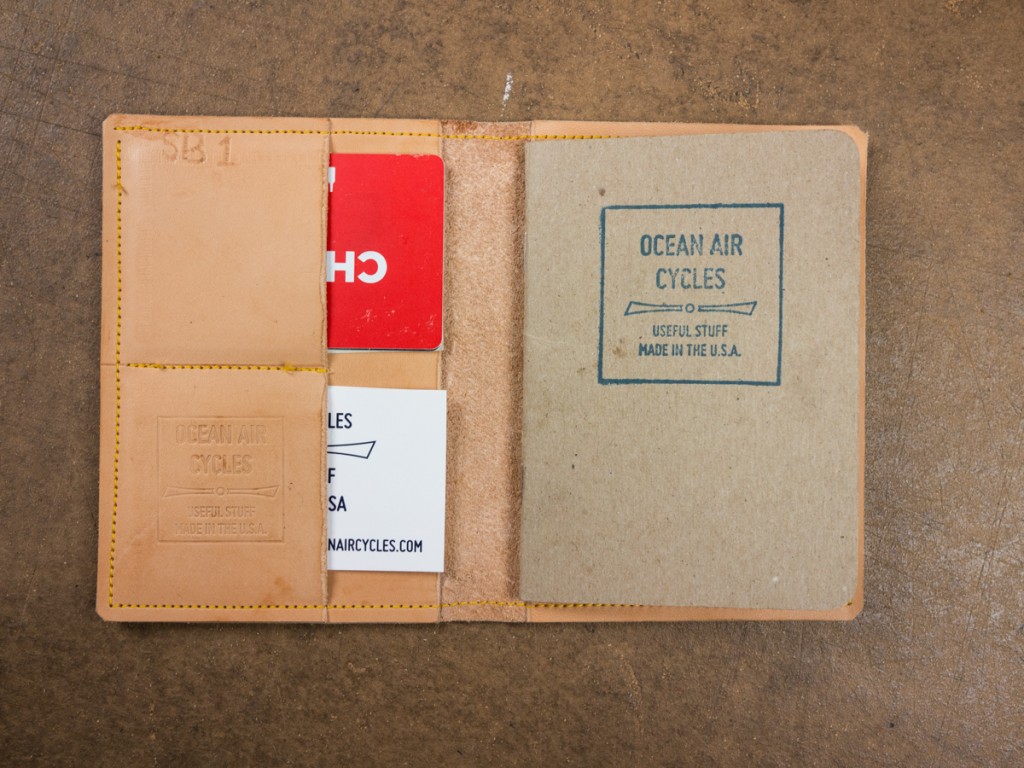
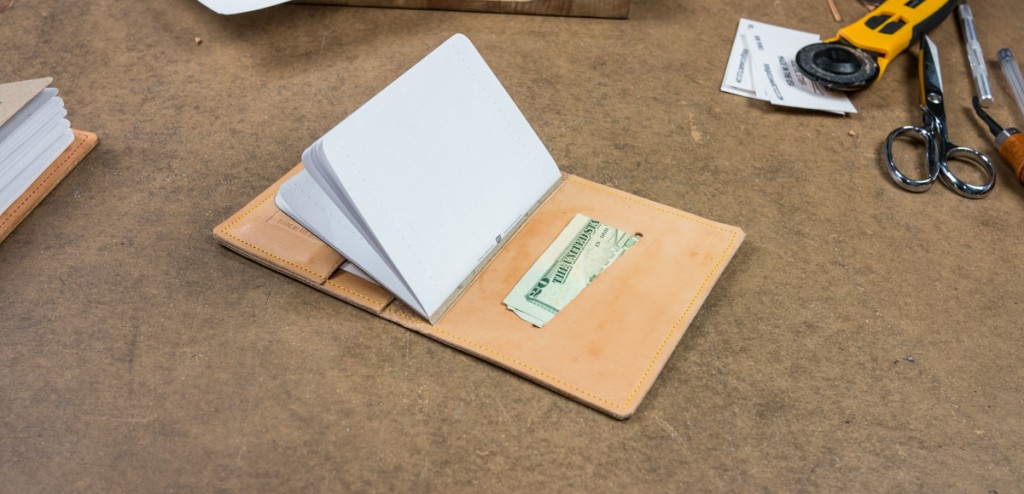 The secret money pocket for those moments when you should have brought a little extra cash, meetings overrun into meals, coffee etc. The whole thing drops into the back pocket, and just makes it into a shirt pocket.
All of our leather goods are made with Veg Tanned natural leather produced in the USA. We treat the leather with a bee’s wax based leather dressing. Use and sunlight will put on the patina, these are built to last, and will just keep getting better with time. This is what one of my early wallets looks like with over a year in the pocket
These will be up on the storefront later today as a custom order item. I also will be switching all of our leather goods, single and double pocket wallets, to a custom order basis so that I can manage the supply a bit better than I have been. I need the demand to get me sewing, and then make the steps to start working with a contractor for some managed growth of the line.