There are more than a few ways to mount the front fender to the crown of the fork, ranging from the modern angle bracket to the vintage daruma bolt. Most of the common solutions involve a joining piece of some sort that holds the fender to a bolt running through the fork crown. All of these work well with Ramblers and are safe and good when properly employed.
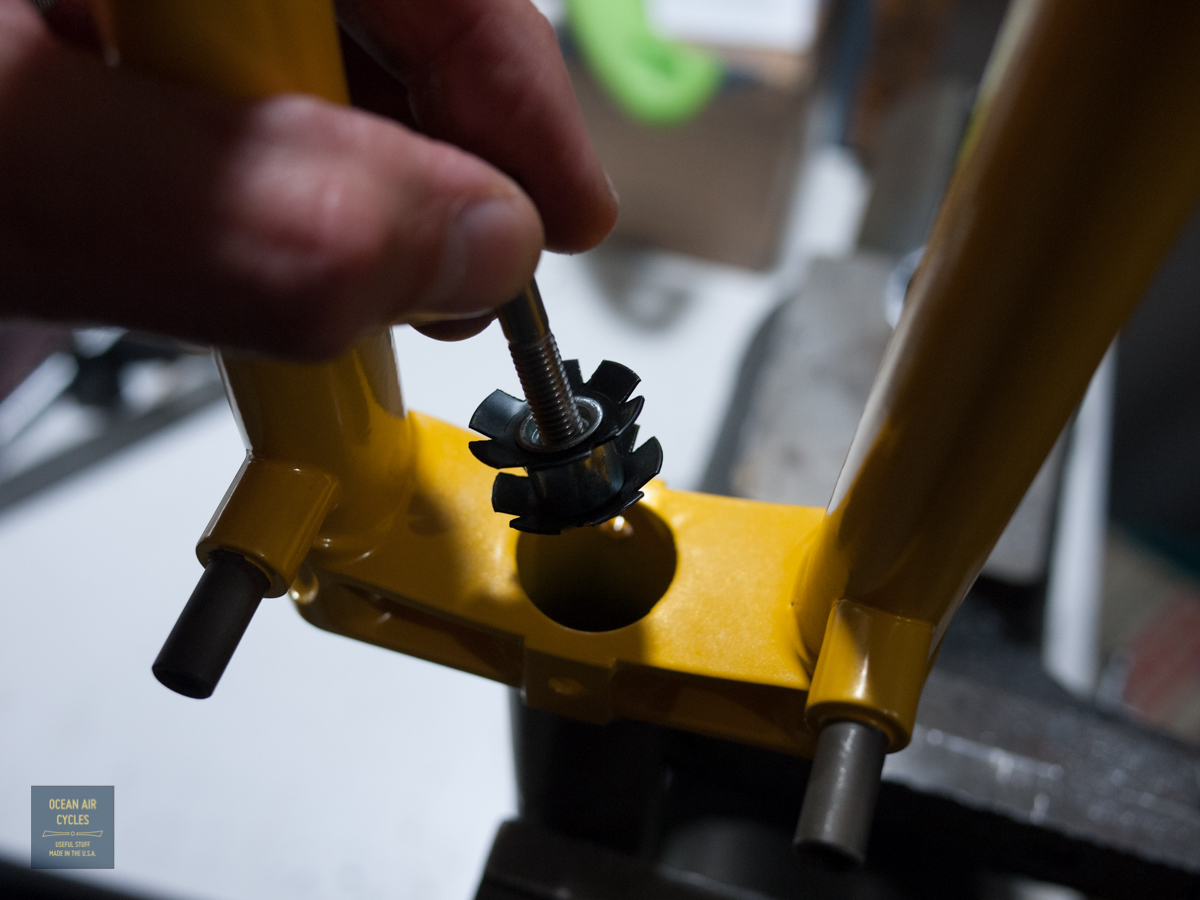
I have been using an alternate method for a while now with great success. Common star fangled nut is mostly used to preload the headset in threadless steerer assemblies. This same nut can be inserted into the bottom end of the steerer and used as a fender attachment point as well. The bottom end of the steerer has a smaller inner diameter than the to for added strength in this highly stressed area. The standard 9/8″ star nut may be tight and the 1″ star nut a little loose. I prefer to adjust the blades of a 1″ slightly outward, but the 9/8″ gets the job done with a bit more insertion force as well. The standard star nut insertion tool is designed to slip over the top of the steerer tube, and will not work in this application. I thread in a M6x60 bolt and use it to steer the nut in with careful hammer taps. I set the nut in about 5-8mm deep and remove the bolt/insertion tool.
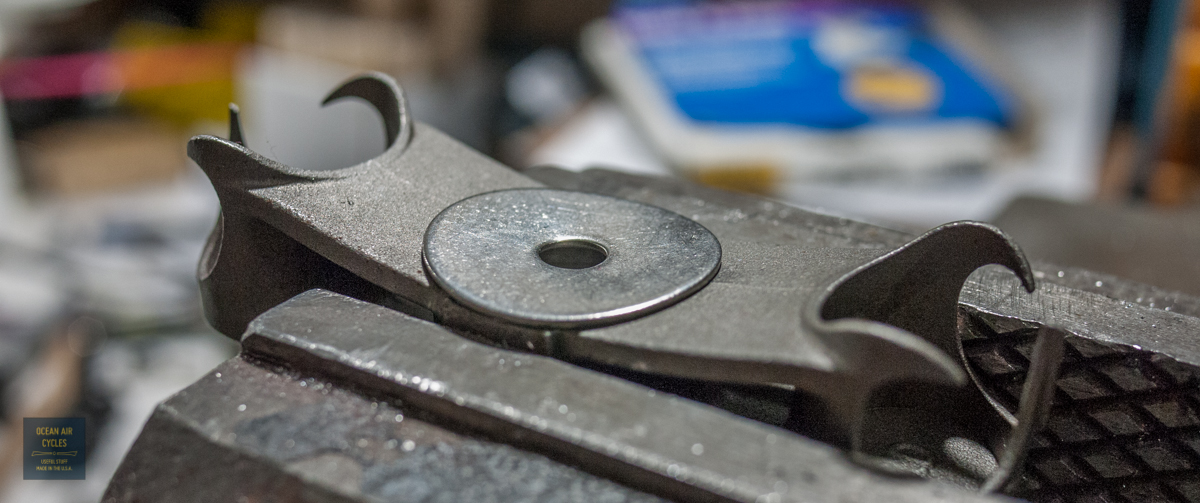
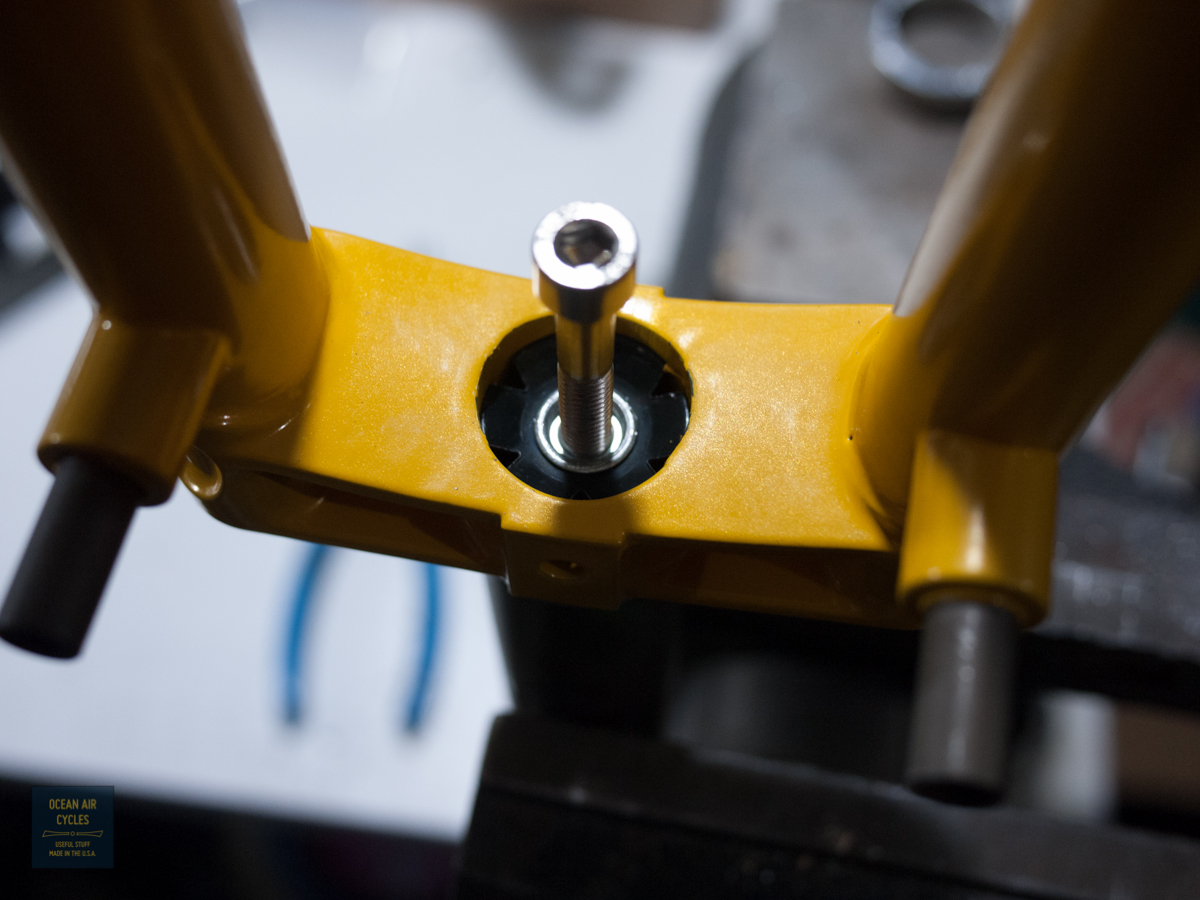 The next hurdle is the washer stack between the crown and the fender. May fender mounting kits are designed around a 1″ steerer, and the included top washer may be to small to seat well against the 9/8″ steerer bottom on a Rambler fork.
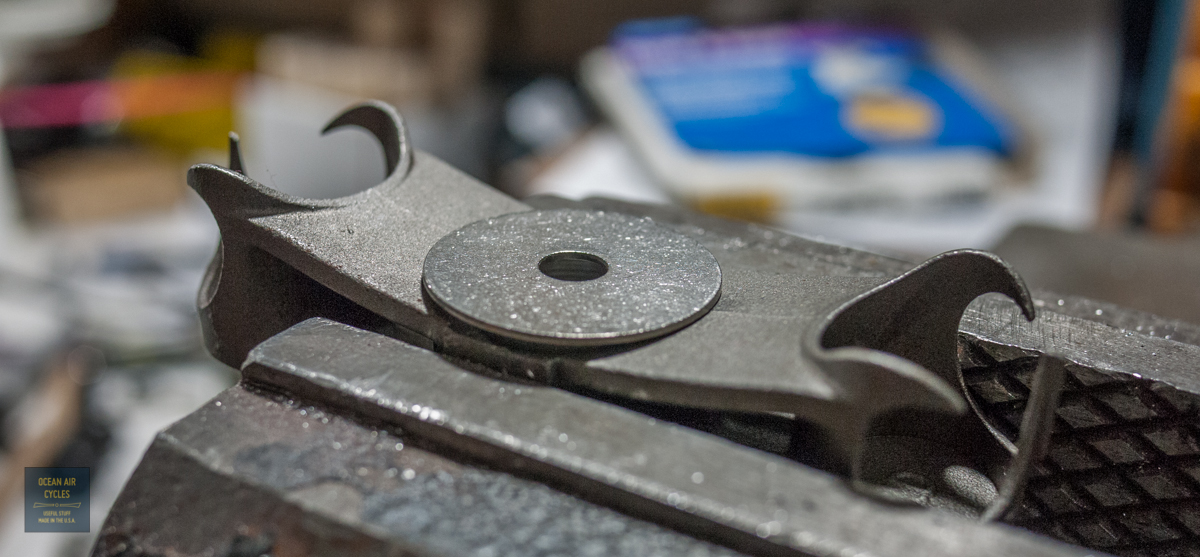
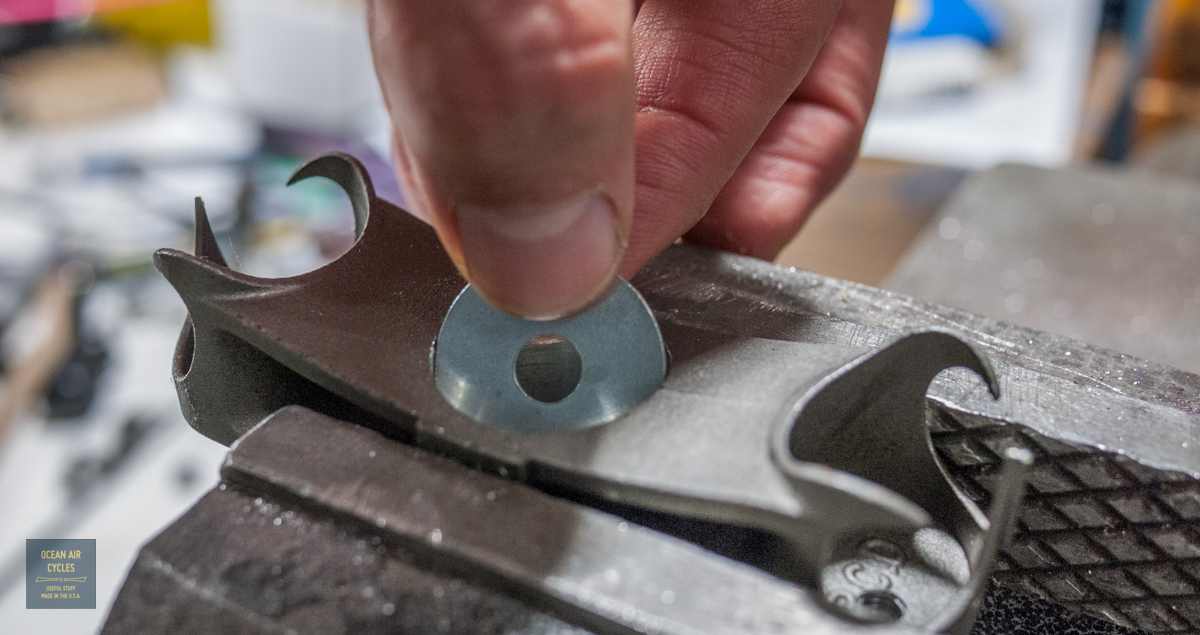 I replace this washer with a 1 1/4″ fender washer. A gentle tap or two with a hammer against the crown will shape the washer to the curvature of the crown for a nice even fit.
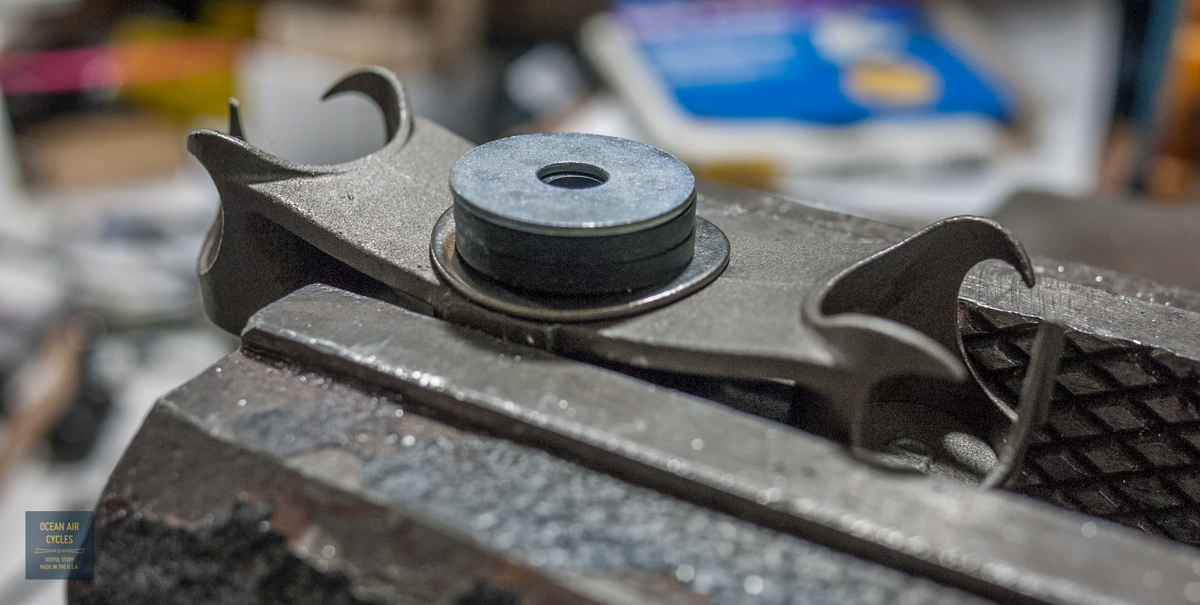
 The gap at between the crown and fender is a few mm on the generous side to ensure maximum clearance between tires and fender. This is easy to adjust with an extra rubber washer or two. For 38mm tires I generally use two 1/8″ rubber washers.
 Last in the stack is a 1″ fender washer between the rubber and the metal fender.
 The entire sandwich is then held in place from the bottom with a M6 bolt and a 1″ fender washer on the inside.
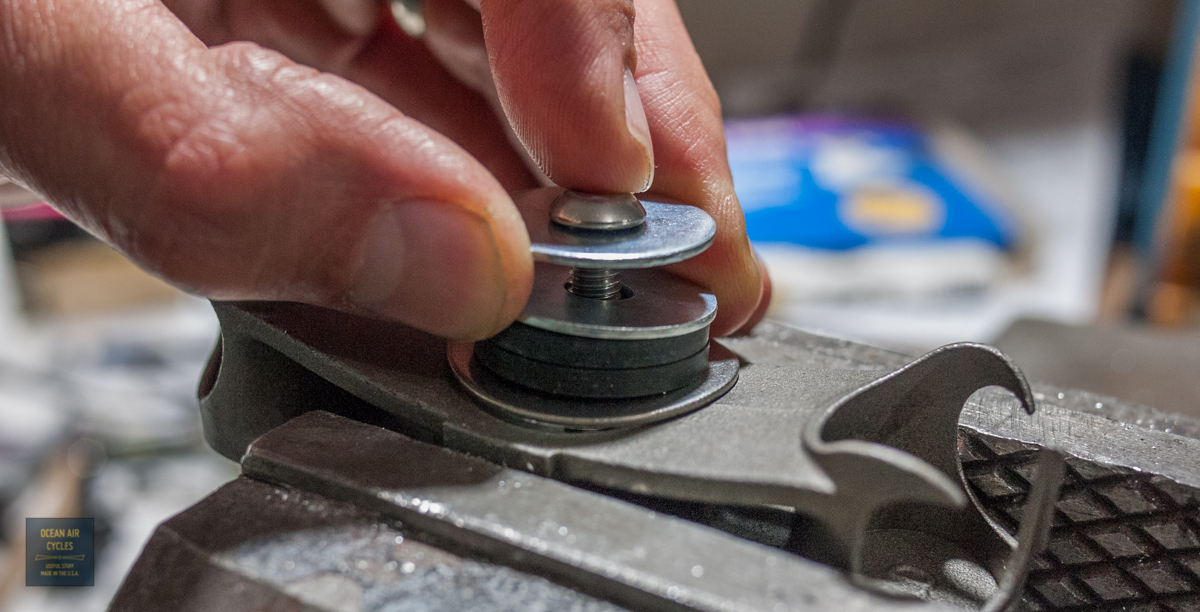 This assembly has held fast on both older builds and recent Ramblers in the past year. As added insurance one could add locktite to the treads of the bolt. Also, as with all fastener based mounting systems, e.g. nuts and bolts, it is a good idea to check them regularly for any hardware that may be loosening in use.
The above washer stack will work with most daruma bolts included in fender hardware kits as well. The fender lower strut mounting is straight forward and will go together per the manufacturer’s instructions.
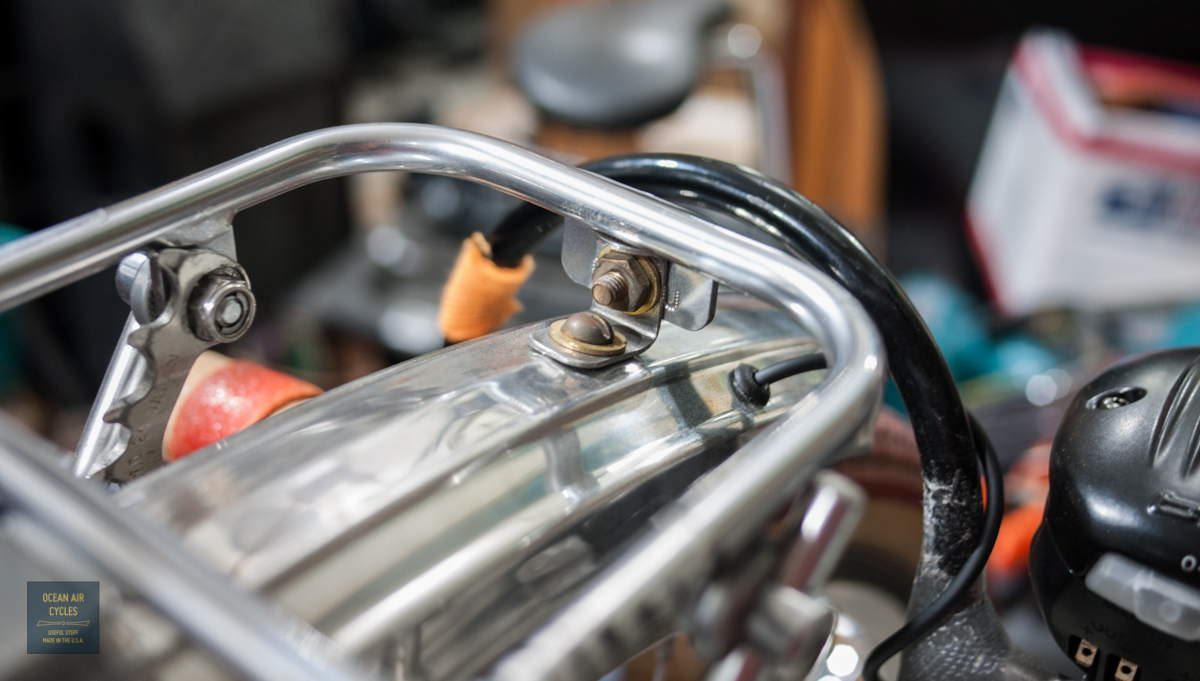
If you are riding rough road or dread the occasional rattle, you can add a third fender mounting point at the front rack. This will greatly improve fender stability, and is good insurance should one of the other mounting points come loose. There is no straight forward way to do this, short of a custom rack, and most if not all solutions will require a bit of ingenuity and a trip to the hardware store. Here is my combo of an unused fender mounting bracket and the Mark’s rack front tab.
 All of the above hardware can be found at your local hardware store, preferably the small sort with a well stocked hardware selection. I have been thinking about adding the above listed small parts to the storefront as a “kit”, let me know if there is sufficient demand, and I will make it happen
Dang! You posted that a day too late. I finally got my Rambler’s fenders installed yesterday.
I ran a bolt through the crown and used a daruma bolt. Wish I’d thought of the star nut!
I didn’t put another metal washer between the rubber bits and fender, do you think that’s a problem?
the daruma is a perfectly good way to do it, and will last forever. THe star nut helps speed things up from a production and assembly standpoint. With what I am doing here, we are constantly looking at ways to speed things up without compromising the quality of the final product. WRT the steel washer sandwich on the fender, it is in many ways a belt and suspenders thing. I do it to ad support to the dimple at this mounting point that controls the fender angle. Back to the speed issue, the fender shaping is done unmounted, but once I have the fender-line I want, the dimple is cold set on the bike with the crown mount. I used to do this at the bench with a custom tool, but two 1″ fender washers provide the same support, and saves me time shaping sheet metal at the bench. With fenders like the Berthoud and VO zeppelin that are close to true diameter out of the box the whole process gets even easier.
You’ve got so many handy small hardware bike building bits… If it was at all reasonable if be interested in seeing you carry some of the items… Fender mounting, dyno cable routing, rack personalization…
I will be adding things as I get it together and refine things into kits. Baby steps and thin capital keep the pace slower than I would like, but getting there one step at a time